
How To Install a Soffit Vent (Step By Step Guide)
 4.2.25
 7 minutes read
Proper ventilation is key to maintaining the integrity of your home’s roof and attic. One effective way to ensure sufficient airflow is by installing a soffit vent. These vents help regulate temperature and moisture in your attic, preventing issues like mold, rot, or ice dams during colder seasons. If you’re wondering how to install a soffit vent yourself, this guide will walk you through every step. We’ll cover:
- Types of soffit vents to consider
- The benefits of proper soffit ventilation
- Exact step-by-step instructions to install them
👉 Types of Soffit Vents to Consider
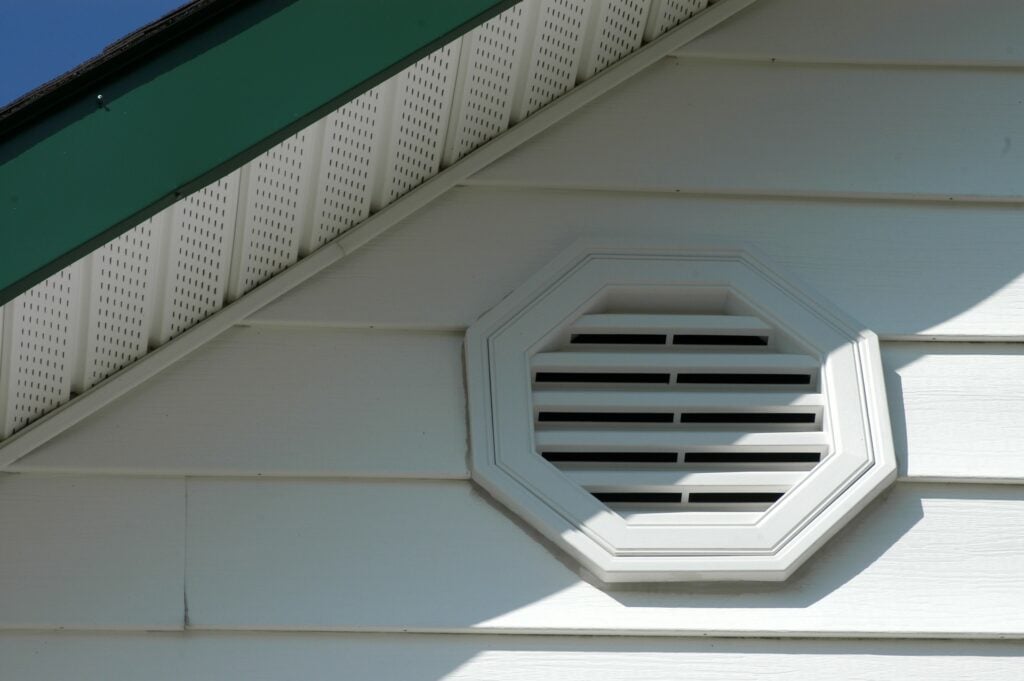
Choosing the right soffit vent is essential for maintaining proper ventilation in your home and preventing issues like moisture buildup or poor airflow. Each type of soffit vent offers distinct advantages, so it’s important to select the one that best suits your needs and soffit design. Below are some of the most common types of soffit vents to help you make an informed decision:
- Strip Vents: Long, narrow vents installed in continuous lines along wide soffits for efficient airflow.
- Round/Circular Vents: Small, individual vents ideal for narrow or irregular soffits, often DIY-friendly.
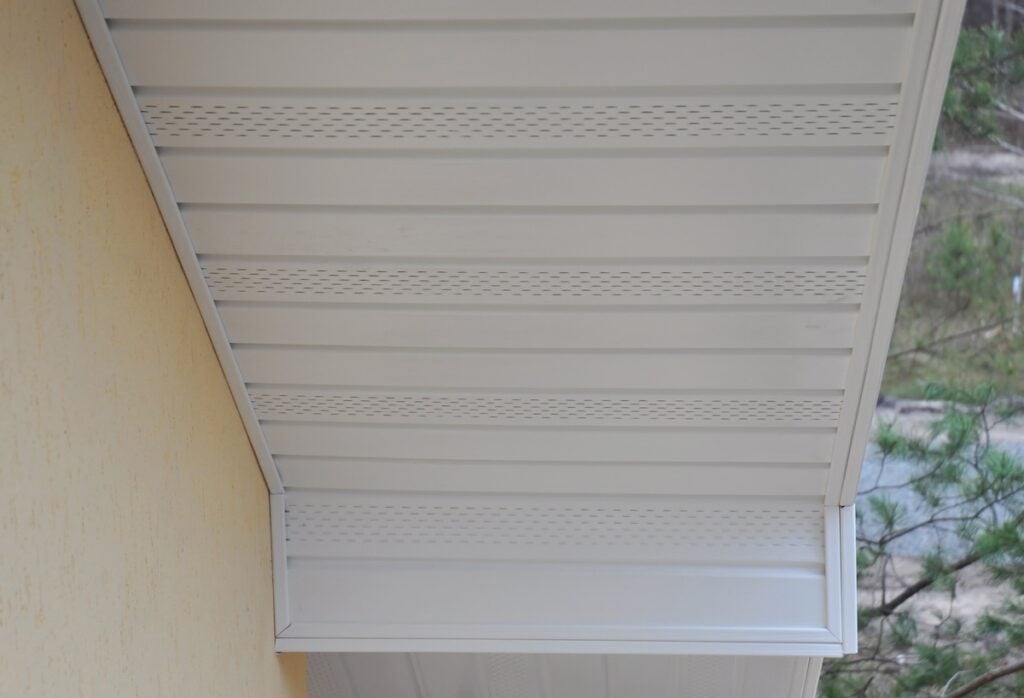
- Perforated Panels: Sleek panels with built-in ventilation holes, covering larger areas and blending with soffit materials.
✅ 6 Steps to Install a Soffit Vent
Follow these easy steps to install soffit vents. Even if you’re a novice at DIY projects, you can handle this with some basic tools and attention to detail.
1. Plan and Measure
The first step in ensuring proper ventilation for your attic is to determine how many soffit vents you will need. Proper ventilation is crucial for maintaining a healthy attic environment, preventing moisture buildup, and regulating temperature. To calculate the number of vents required, follow the general guideline of one vent for every 150 square feet of attic space. For example, if your attic has 600 square feet, you’ll need at least four vents. Once you have an idea of the number of vents, measure the soffit area where the vents will be installed. Take into account the spacing to ensure the vents are distributed evenly along the length of the soffit. Proper spacing is important to achieve balanced airflow across the attic, which will help maximize the ventilation system’s efficiency.
2. Mark the Cutouts
After planning and measuring, the next step is to carefully mark the locations for the vent cutouts. Use a pencil or marker to outline the exact position of each vent on the soffit. Take your time to ensure the marks are evenly spaced and consistent throughout the soffit area. Uneven or poorly planned placement can result in inefficient airflow or an unprofessional appearance. Once all the vent locations are marked, step back and take a look at the soffit from the ground. This will help you confirm that the placement is symmetrical and visually appealing when viewed from below. Accuracy and attention to detail in this step will make the installation process much smoother and result in a better final outcome.
3. Cut the Holes
With the positions marked, you can begin cutting the holes for the soffit vents. Before starting, ensure you have all the necessary tools, including a drill, jigsaw, and safety glasses. Safety is key, so put on your safety glasses to protect your eyes from flying debris during the cutting process. Start by drilling a pilot hole at one end of the marked outline for each vent. The pilot hole will create an entry point for your cutting tool, making it easier to insert the jigsaw blade. Carefully guide the jigsaw along the marked lines, taking your time to ensure clean and precise cuts. Accurate cuts are essential for a secure fit when installing the vents later. After cutting each hole, clear away any sawdust or debris to keep the work area clean and ready for the next step.
4. Install the Vent Covers
Once all the holes are cut, it’s time to install the vent covers. Begin by positioning each vent cover over its corresponding opening to check for a snug fit. If the vent cover doesn’t fit perfectly, you may need to make slight adjustments to the cutout. When you’re satisfied with the fit, secure the vent cover in place using screws. Be sure to tighten the screws evenly around the cover to ensure it sits flush against the soffit. Uneven tightening can cause the cover to warp, which may affect both its appearance and functionality. Take your time to double-check each vent cover after installation to ensure it is secure and properly aligned. A well-installed vent cover will not only function effectively but also contribute to a clean and professional look for your home.
5. Seal the Edges (Optional)
For added protection against moisture, pests, or dust, consider sealing the edges of each vent cover with caulk. This step is particularly useful if you live in an area with high humidity, heavy rainfall, or frequent pest activity. Apply a thin bead of caulk around the perimeter of each vent cover, ensuring the seal is even and consistent. This will help create a barrier that prevents water or small insects from entering through any gaps. Allow the caulk to dry completely before testing the ventilation system or exposing the vents to the elements. While this step is optional, it can provide peace of mind and added durability, especially in challenging climates.
6. Test the Ventilation
After all the vents are installed, it’s important to test the system to ensure it is working correctly. Start by inspecting each vent to confirm proper alignment and a secure fit. On a breezy day, stand near the vents and check for airflow. You should be able to feel air movement, which indicates that the vents are functioning and promoting proper ventilation in the attic. If you don’t notice any airflow, you may need to recheck the installation to ensure the vents are not blocked and are aligned with the attic’s ventilation system. Moving forward, it’s a good idea to periodically inspect your soffit vents to ensure they remain in good condition. Regular maintenance will help keep your attic properly ventilated, protecting your home from moisture, mold, and temperature extremes.
⭐️ 6 Key Benefits of Installing a Properly Ventilated Soffit
Still on the fence about soffit vents? Here’s what they can do for your home:
Temperature Regulation
Proper attic ventilation helps keep your attic cooler during the summer months by allowing hot air to escape. This prevents heat buildup, which can make your home uncomfortably warm and put added strain on your cooling system.
Improved Energy Efficiency
With better ventilation, your HVAC system doesn’t have to work as hard to maintain a comfortable indoor temperature. This reduces energy consumption and leads to noticeable savings on your utility bills over time.
Moisture Reduction
Attic ventilation helps control moisture by reducing condensation. This is especially important in humid climates, as excessive moisture can lead to mold, mildew, and even structural damage if left unchecked.
Prolong Roof Lifespan
By preventing heat and moisture buildup, ventilation protects your roof from premature aging. Excessive heat can warp shingles, while trapped moisture can lead to rot and damage to the materials supporting your roof.
Ice Dam Prevention
During winter, proper ventilation ensures consistent roof temperatures, preventing the formation of ice dams. These occur when snow melts unevenly and refreezes at the edges of your roof, causing water to back up under shingles.
Better Indoor Comfort
With a well-ventilated attic, your home will experience more stable indoor temperatures year-round. You’ll feel cooler in the summer and warmer in the winter, creating a more comfortable living environment for you and your family.
🛠️ Soffit Vent Installation
At Kenneth Daniel Roofing, we understand that proper ventilation is key to the health and longevity of your roofing system. With our unmatched expertise, attention to detail, and commitment to exceptional customer service, we’re the team you can rely on for all your roofing needs, including soffit vent installation and maintenance.
Don’t leave your home’s protection to chance—trust the experts who treat your roof like it’s their own. Contact Kenneth Daniel Roofing today for a free consultation and let us help you keep your roof in top shape for years to come!
EXPLORE OUR RECENT ARTICLES

We’re Redefining Roofing. You In?
