
Roof Leak Repair: 5 Steps To Tackle A Leaky Roof
 10.4.23
 11 minutes read
Does water drip from your ceiling whenever it rains? Are you dealing with water-logged roof decking, framing, or worse? We understand your problem and know how daunting it can be to deal with annoying roof leaks. That’s why we’re here to walk you through prompt and efficient roofing solutions for repairing leaks as soon as possible so that you can avoid further damage to your home or commercial building.
This article results from our first-hand expertise in roof leak repair, as we are GAF certified. It shares detailed research on practical tips to locate and repair common roof leak issues.
- Stay dry in all seasons
- Prevent DIY faux pas
- Have an enviable roofline
- Be stress-free
Key Takeaways
- Common Causes: Roof leaks are often caused by improper installation, aging materials, storm damage, and debris accumulation.
- Finding a Leak: The true source of a roof leak repair is often several feet away from the visible damage, so a thorough search is required.
- Temporary vs. Permanent Fixes: While a quick fix is an option, a roof leak repair is not a long-term solution. They are meant to prevent further damage until a professional can perform a permanent repair.
- DIY vs. Professional: While some minor roof leak repair might be manageable for a homeowner, more complex issues should always be handled by a professional.
- Prevention: The best way to avoid future leaks is through regular roof maintenance, including cleaning gutters and addressing small problems promptly.
What Causes a Leaky Roof?

A leaky roof can be a homeowner’s nightmare, and understanding the root causes is the first step in prevention. Several factors can contribute to a leaky roof, including improper installation, age, debris, storm damage, and material failure. Improper installation often results from shoddy workmanship or the use of subpar materials, leading to vulnerabilities in your roof’s structure. Regular roof inspections, especially after severe weather events, can help catch these issues early.
As your roof ages, its materials naturally begin to break down and lose their resilience. This degradation makes regular inspections even more crucial to catch potential problems before they escalate. Debris, such as leaves and branches, can also accumulate and cause water to pool, leading to leaks.
Storm damage, including high winds and hail, are the most common cause for a roof leak repair immediate and visible damage, while material failure, such as cracked shingles or damaged flashing, can develop over time. By understanding these causes, you can take proactive steps to maintain your roof’s integrity and prevent leaks.
The Impact of Roof Leaks on Your Home
Roof leaks can wreak havoc on your home, leading to a cascade of problems if not addressed promptly. Water damage is the most immediate concern, as it can affect your ceilings, walls, and even your home’s foundation. This moisture can also create the perfect environment for mold growth, which poses health risks to your family and can be difficult and costly to remove.
Structural issues are another significant consequence of not addressing a quick roof leak repair. Persistent water infiltration can weaken the roof structure, leading to sagging or even collapse in severe cases. Additionally, roof leaks can compromise the insulation in your attic, reducing your home’s energy efficiency and increasing your utility bills.
The longer a roof leak goes unchecked, the more extensive and expensive the repairs can become, potentially leading to the need for a full roof replacement. Addressing roof leaks promptly is essential to maintaining the safety, security, and value of your home.
How To Find and Locate a Roof Leak

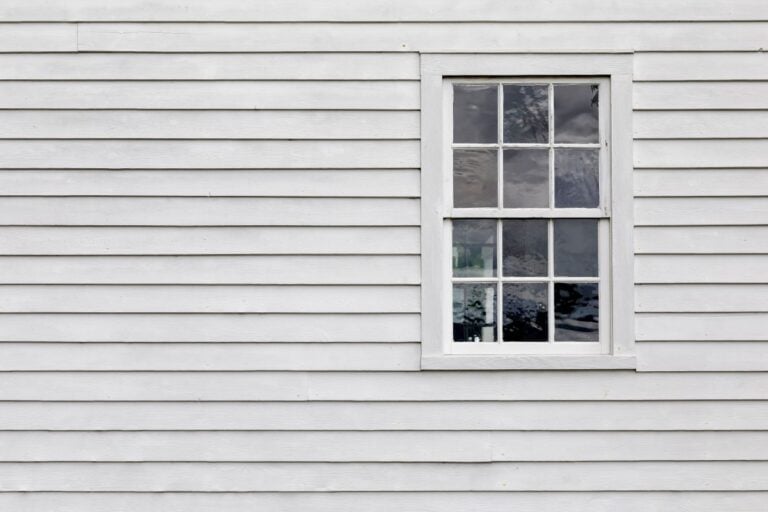
Check for wet spots or stains on the drywall sheeting or rafters to find common roof leaks. These damp areas indicate water infiltration and leaks. Look for holes or tears in the flashing around chimneys, vents, and skylights.
Look for Wet Spots on Sheeting or Rafters
Moisture seeping through your roof shingles can pool in these areas indicates a potential problem from a leaking roof.
Using a flashlight, scan the area for shiny or damp spots. Depending on your ceiling, they can be difficult to see. When you discover any such area, please don’t touch it with bare hands as the water can contain harmful substances.
These wet spots signal that our emergency roof team needs to make repairs in that location and provide a long-term fix rather than an insufficient patch job.
Check for Holes or Tears in the Flashing
Inspecting the flashing on your roof helps identify potential leak spots. Chimney leaks can often arise from damaged flashing around chimneys, making it crucial to inspect this area thoroughly. The most common flashing types are often made of thin metal or rubber, protecting against water seeping at the joints of your roofing system or from roof penetrations.
This protective layer undergoes harsh elements from the sun and cold and will deteriorate. Our team has the credentials to fix it properly.
Make a yearly habit to perform a maintenance check. We look for these common signs of damage in our inspections:
- Rust
- Corrosion
- Missing pieces or holes
- Tears or faults
Our team of roofing experts is certified to spot these problems and help prevent future damage.
5 Steps For a Successful Roof Leak Repair

A successful roof leak repair is more than just stopping the drip. It requires a thorough process to ensure the leak won’t return. When planning a roof leak repair, make sure they perform these essential checks:
1. Locate the True Source of the Leak:
Water can travel far from the point of entry before it becomes visible on your ceiling. A thorough inspection should start in the attic, looking for water stains or dampness on the rafters and sheathing. The professional should then trace the leak uphill to its exact entry point, checking for signs of damage that may be several feet away from the visible leak.
2. Inspect All Vitals
A leak is often a symptom of a larger issue. The contractor should inspect the usual suspects, including:
- Flashing: Check for loose, rusted, or damaged flashing around chimneys, vents, and skylights.
- Pipe Boots: Look for cracks in the rubber seals around plumbing vents.
- Shingles: Assess for missing, cracked, curled, or damaged shingles, especially in valleys and at the roof’s edge.
3. Evaluate the Decking
The roof deck is the foundation of your roof. You should check for signs of moisture, rot, or softness in the decking. A compromised deck will not properly support new shingles and can lead to future issues. That’s why inspecting it is a must-do step during a roof leak repair.
4. Check the Ventilation
Improper attic ventilation can lead to a buildup of moisture and heat, which can cause dry rot and compromise your roof’s integrity. A comprehensive roof leak repair check should include an assessment of your ventilation system’s effectiveness.
5. Test the Repair
After the roof leak repair is complete, you should test the watertight seal. This is often done with a garden hose, applying water to the repaired area while another person watches from inside to ensure the leak is completely gone. This final step is crucial for confidence and peace of mind.

Tips for Repairing a Roof Leak
When doing a roof leak repair, use protective equipment such as gloves, goggles, and a safety harness, or call a professional roofing expert like our team. For complex repairs, it is advisable to consult a roofing contractor to get an accurate cost assessment and benefit from their expertise.
Gather the necessary tools and materials like roofing cement and sealant, nails, flashing, or replacement parts like vent boots.
Read the manufacturer’s instructions to ensure a proper fix. Repairs and routine maintenance can prevent further damage to your roof.
Temporary Fixes for a Leaking Roof
When you discover a leaking roof, immediate action is crucial to prevent further damage until a professional can perform a permanent repair. While temporary fixes are not a substitute for a proper roof leak repair, they can buy you some time. One common temporary solution is to apply roofing cement or caulk to seal any visible gaps and cracks. This can help stop water from seeping through until a more permanent fix is made.
Another effective temporary measure is to use tarps or plastic sheeting to cover the affected area. Secure the tarp with roofing nails or heavy objects to ensure it stays in place, especially during windy conditions. Nevertheless, learning how to tarp a roof requires some important steps, so you can count on us for that, too. Roofing tape is also a handy tool for covering small gaps and leaks. It provides a quick and easy way to patch up minor issues temporarily. However, it’s important to remember that these fixes are only a temporary roof leak repair. They should be replaced with a permanent solution as soon as possible to ensure the long-term health and safety of your roof.
Safety Considerations
Safety is paramount when it comes to repairing a roof leak. Roofing is dangerous. Always use safety ropes to secure yourself and prevent falls when working on a roof.
For steep roofs, use a ladder framework for stable anchoring. Bad weather conditions aren’t ideal to make roof repairs. However, if you must make repairs in inclement weather, adequate safety measures must be followed, especially when working at heights.
By prioritizing safety, you can fix your roof leak while protecting yourself and others involved.

Tools and Materials Required
You’ll need some important tools and materials to fix a roof leak. Safety should always be a priority when working on your roof, so have safety goggles, gloves, and sturdy shoes.
Here is a list of materials you’ll need for a successful roof leak repair:
- Roofing cement
- Roofing nails
- Flashing
- Vent boots or vent pipe boots
- Putty knife
And here are some other roofing tools you need:
- A ladder to safely access your roof
- Self-tapping metal screws to secure loose shingles or replace damaged ones
- A putty knife for applying the cement
- A wire brush or abrasive steel wool to clean surfaces
For a temporary roof leak repair, consider using plastic cement. It can be easily applied with tools like caulk guns and putty knives to create a strong, leak-proof bond. You’ll also need quality shingle products to replace damaged pieces that match the existing roof material. Bundles of shingles are heavy, so many homeowners call us. Further, you may need a sheet of plywood to patch bigger sections, and it’s wise to seal the area with roof sealant products. And last but not least, roofing cement will help you seal the leaks and remove debris before applying the compound.
Common Mistakes to Avoid in DIY Roof Leak Repair
A DIY roof leak repair can save you money, but it comes with significant risks. Without the right expertise, a small mistake can lead to bigger problems, costing you more in the long run. To ensure your roof leak repair is successful, you must be aware of common pitfalls and know when to call a professional.
- Using the Wrong Materials: It’s a common error to use standard caulk or non-roofing-grade sealants. These materials can fail quickly under extreme weather and UV exposure, providing a temporary fix that doesn’t last. Always use products specifically designed for roofing, such as roofing cement or specialized sealants.
- Underestimating the Scope of the Problem: A visible water stain on your ceiling may seem like a simple fix, but the actual leak could be several feet away. Water travels along rafters and insulation, making it difficult to pinpoint the true source. A quick patch on the wrong spot will not solve the underlying issue.
- Neglecting Safety: Working on a roof is inherently dangerous. Without proper safety equipment—like harnesses, secure ladders, and non-slip footwear—you risk serious injury from a fall. A professional roof leak repair team is trained and equipped to work safely at heights.
- Creating More Damage: An inexperienced hand can cause more damage than they fix. Improperly prying up shingles can break them, and walking on a wet or weak roof can compromise its structural integrity. A DIY roof leak repair can accidentally turn a minor issue into a major one.
Final Insights on Fixing Roof Leaks
A roof leak repair can be a manageable task that Rocky Mount, Macon, Lake Gaston, and all North Carolina and Virginia homeowners can tackle themselves. Safety should always be a top priority when working on your roof, so take precautions and use appropriate equipment. Following these instructions, you can address damaged flashing or missing shingles using sealant or caulk.
Contact our organized team today, and we’ll schedule a free consultation to start on your roof repairs.
EXPLORE OUR RECENT ARTICLES

We’re Redefining Roofing. You In?
