
How To Install Ridge Cap Shingles (Our 4 Step Guide)
 8.20.24
 7 minutes read
Are you a DIY homeowner eager to tackle your next roofing project? Installing ridge cap shingles is a fantastic way to add a professional touch to your roof while ensuring it remains weatherproof and durable. Whether you’re an experienced DIYer or a novice looking to expand your skills, this guide will walk you through how to install ridge cap shingles, making it easy to achieve great results, including:
- Understanding Ridge Cap Shingles
- Tools and Materials You’ll Need
- 4 Step Installation Process
- Tips for Maintaining Your Ridge Cap Shingles
- FAQs
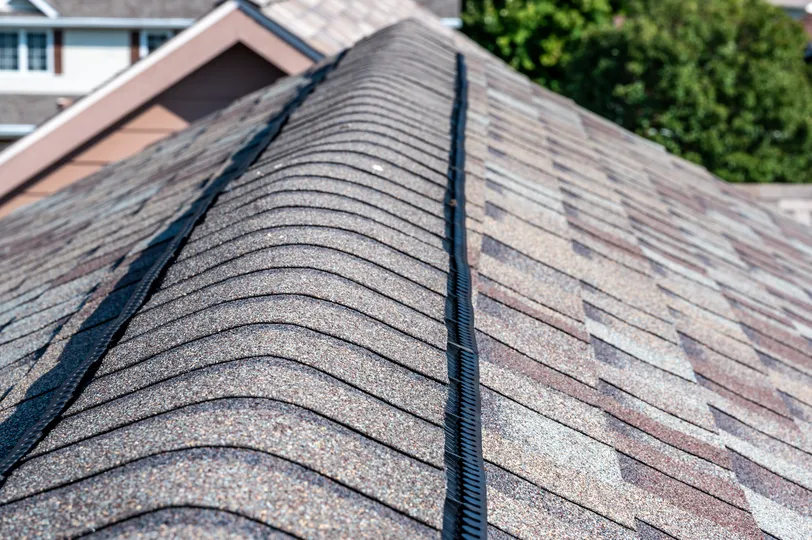
🤔 Understanding Ridge Cap Shingles
Ridge cap shingles are specialized shingles used to cover the peaks or ridges of your roof. They provide a finished look and protect the roof from water infiltration at these vulnerable points.
What Are Ridge Cap Shingles?
Ridge cap shingles are designed to fit snugly over the ridges of your roof, where two slopes meet. They are typically pre-bent to conform to the shape of the roof peak and are made from the same material as your regular shingles.
Why Use Ridge Cap Shingles?
Using ridge cap shingles ensures that your roof is completely sealed against the elements. They provide added protection and durability compared to regular shingles that might not fit as securely on the roof’s ridges.
Types of Ridge Cap Shingles
You can find ridge cap shingles in various materials, including asphalt, wood, and metal. Each type has its benefits, so choose the one that best matches your existing roof material and aesthetic preferences.
Benefits of Installing Ridge Cap Shingles
Installing ridge cap shingles offers several advantages that go beyond mere aesthetics. Here are some key benefits:
- Enhanced Protection: Ridge cap shingles provide an additional layer of protection against water penetration, helping to prevent leaks and water damage.
- Improved Ventilation: Properly installed ridge cap shingles can improve your roof’s ventilation, allowing hot air to escape and reducing the risk of moisture buildup.
- Increased Roof Longevity: By sealing the roof’s ridges, ridge cap shingles help extend the lifespan of your roof by protecting it from weather-related wear and tear.
🧰 Tools and Materials You’ll Need
Before you start installing ridge cap shingles, gather the following tools and materials to ensure a smooth process:
Tools Required
- Hammer or nail gun
- Utility knife
- Measuring tape
- Chalk line
- Ladder
- Safety harness
Materials Needed
- Ridge cap shingles
- Roofing nails
- Roofing cement
- Roofing felt (if needed)
🛠️ 4 Step Ridge Cap Shingle Installation Process
Follow these steps to install ridge cap shingles on your roof:
1. Prepare the Roof Ridge
Preparing the roof ridge is a crucial step in the ridge cap shingle installation process, as it ensures a solid foundation for the shingles to adhere properly. This preparation involves cleaning the ridge to remove any debris and checking for any damage that needs repair. A well-prepared ridge not only enhances the longevity of the roof but also helps prevent leaks and other issues down the line.
- Clean the Ridge Area: Remove any debris, old shingles, or nails from the ridge area to create a clean surface for installation.
- Install Roofing Felt: If your roof doesn’t already have it, install roofing felt along the ridge to provide an extra layer of protection.
2. Measure and Cut the Shingles
Measuring and cutting the shingles accurately is crucial in the ridge cap shingle installation process. This step ensures a proper fit, which helps prevent leaks and enhances the overall aesthetic of the roof. Taking the time to measure carefully can lead to a more durable and visually appealing finish.
- Measure the Ridge Length: Use a measuring tape to determine the length of the ridge, then cut the ridge cap shingles to the appropriate size using a utility knife.
3. Install the Ridge Cap Shingles
Installing the ridge cap shingles is a crucial step in the roofing process as it provides proper sealing and protection against water infiltration at the peak of the roof. This not only enhances the roof’s overall durability but also contributes to its aesthetic appeal. Proper installation ensures that the shingles effectively direct water away from the roof, preventing potential leaks and extending the lifespan of the roofing system.
- Start at One End: Begin installing the ridge cap shingles at one end of the ridge, working your way toward the opposite end.
- Overlap the Shingles: Each shingle should overlap the previous one by about half its length. Secure each shingle with roofing nails, placing them about 1 inch from the edges.
4. Seal the Shingles
Sealing the shingles is a crucial step in the ridge cap shingle installation process, as it helps prevent water intrusion and protects the underlying roofing materials. Properly sealing the shingles enhances their lifespan and ensures a secure fit, reducing the risk of wind uplift. This step not only contributes to the overall durability of the roof but also improves its resistance to the elements.
- Apply Roofing Cement: Use roofing cement to seal the edges of the ridge cap shingles, ensuring there are no gaps where water can penetrate.
💡 Tips for Maintaining Your Ridge Cap Shingles
Proper maintenance can extend the life of your ridge cap shingles and keep your roof in top condition:
Regular Inspections: Check your ridge cap shingles regularly for signs of damage or wear. Promptly address any issues to prevent further damage.
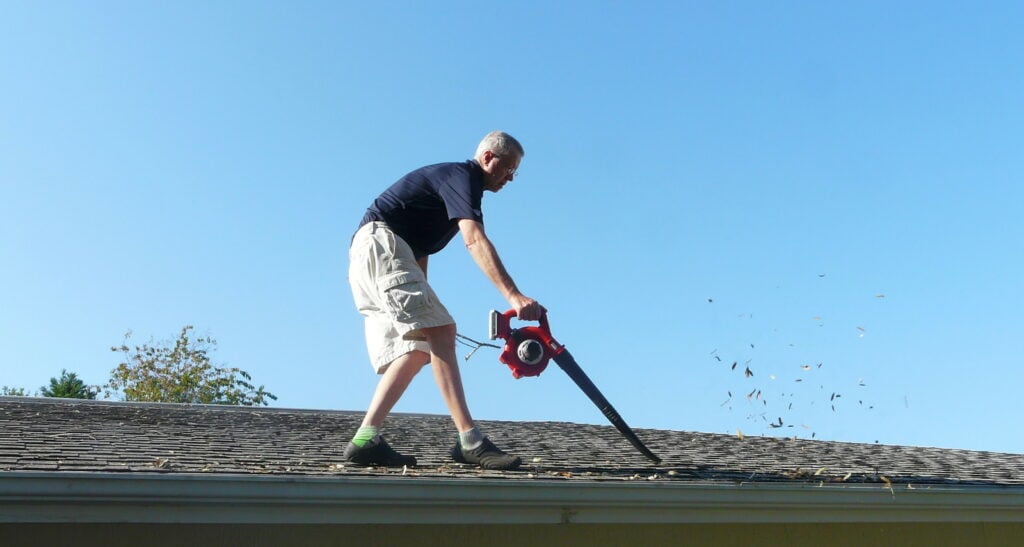
Clean Debris: Remove leaves, branches, and other debris from your roof to prevent moisture buildup and potential damage.
Check for Loose Shingles: Ensure all shingles are securely fastened. If any are loose, re-nail them promptly.
Sealant Application: Consider applying a high-quality roof sealant to protect against moisture and extend the life of your shingles.
Trim Overhanging Branches: Keep trees trimmed to prevent branches from rubbing against the shingles and causing damage.
Check Flashing: Inspect the flashing around the ridge cap for any gaps or damage, and repair as needed to keep water from seeping under the shingles.
Maintain Gutters: Ensure your gutters are clean and functioning properly to prevent water overflow, which can lead to roof damage.
Professional Inspections: Schedule regular inspections with a roofing professional to catch any potential issues before they become major problems.
Common Mistakes to Avoid
Even experienced DIYers can make mistakes when installing ridge cap shingles. Here are some common pitfalls to watch out for:
- Incorrect Overlapping: Ensure each shingle overlaps the previous one sufficiently to prevent water infiltration.
- Using the Wrong Nails: Use roofing nails specifically designed for this purpose. Regular nails may not provide the necessary hold.
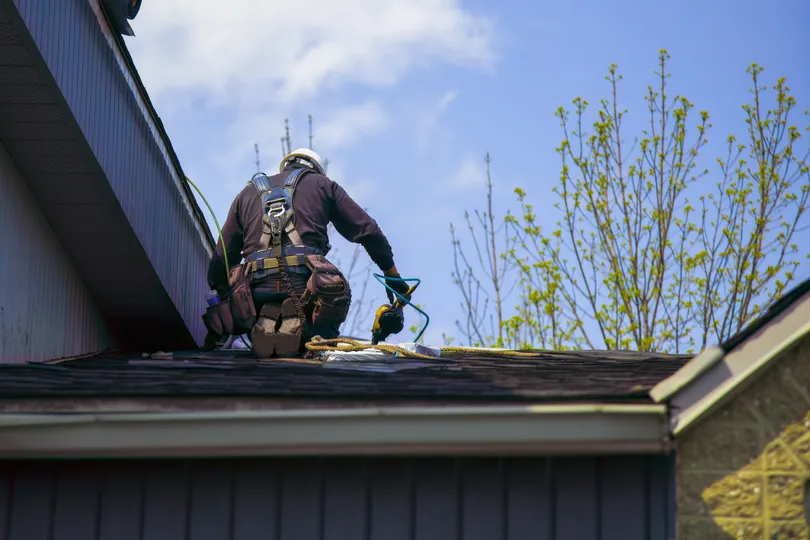
- Ignoring Safety Precautions: Always wear a safety harness when working on your roof, and ensure your ladder is secure.
❓ FAQs
Q: Can I Install Ridge Cap Shingles Myself?
Yes, with the right tools and instructions, you can install ridge cap shingles yourself. However, if you’re uncomfortable with heights or unsure about any step, consider hiring a professional.
Q: How Long Do Ridge Cap Shingles Last?
The lifespan of ridge cap shingles depends on the material and quality. Asphalt shingles typically last 20-30 years, while metal and wood shingles can last longer.
Q: Do Ridge Cap Shingles Improve Roof Ventilation?
Yes, properly installed ridge cap shingles can enhance roof ventilation, reducing heat buildup and moisture accumulation.
🙌 Enhance Your Roof with Kenneth Daniel Roofing
Installing ridge cap shingles is a manageable DIY project that can significantly improve the look and functionality of your roof. By following these steps and taking the necessary precautions, you can achieve professional results and enjoy the benefits of a well-protected roof.
At Kenneth Daniel Roofing, we pride ourselves on providing top-notch roofing services with clear communication and expert craftsmanship. Whether you’re looking for a complimentary roof inspection or a full roof replacement, our team is ready to help. Contact us today to experience our award-winning service firsthand.
EXPLORE OUR RECENT ARTICLES


We’re Redefining Roofing. You In?
