
Roofing Underlayment (Types, Installation & More)
 2.14.25
 9 minutes read
When it comes to roofing, most homeowners think about shingles, tiles, or metal panels. But there’s an unsung hero beneath the top layer of your roof that plays a vital role in protecting your home—roofing underlayment. This essential barrier acts as your roof’s first line of defense against moisture, weather, and leaks.
If you’re considering a roof replacement or repair, understanding roofing underlayment is critical. From the different types available to proper installation, this guide will walk you through everything you need to know about this essential roofing component. Here’s what we’ll cover:
- What is roofing underlayment, and why is it important?
- Steps to install roofing underlayment
- Common mistakes to avoid when using roofing underlayment
🤔 What is Roofing Underlayment, and Why is it Important?
Roofing underlayment is a hidden yet crucial protective layer installed directly onto your roof deck beneath the shingles or outer roofing material. This durable barrier plays a vital role in shielding your home from water penetration caused by rain, snow, and ice, providing an extra layer of protection against leaks.
Its importance cannot be overstated. Roofing underlayment acts as a secondary defense if the outer layer is ever damaged, safeguarding your roof deck from rot and mold caused by water exposure. By doing so, it enhances your roof’s durability and extends its overall lifespan.
Types of Roofing Underlayment
Roofing underlayment comes in various types, each serving slightly different purposes. Below is a breakdown of the three main types to help you choose the right one for your home.
- Asphalt-Saturated Felt: Affordable and water-resistant, this traditional option is easy to install but less durable and prone to tearing in extreme weather.
- Synthetic Roofing Underlayment: Lightweight and exceptionally durable, synthetic options are slip-resistant and easy to install but come at a slightly higher cost.
- Rubberized Asphalt: A premium choice with a waterproof adhesive layer, perfect for wet or cold climates, though it’s the most expensive option.
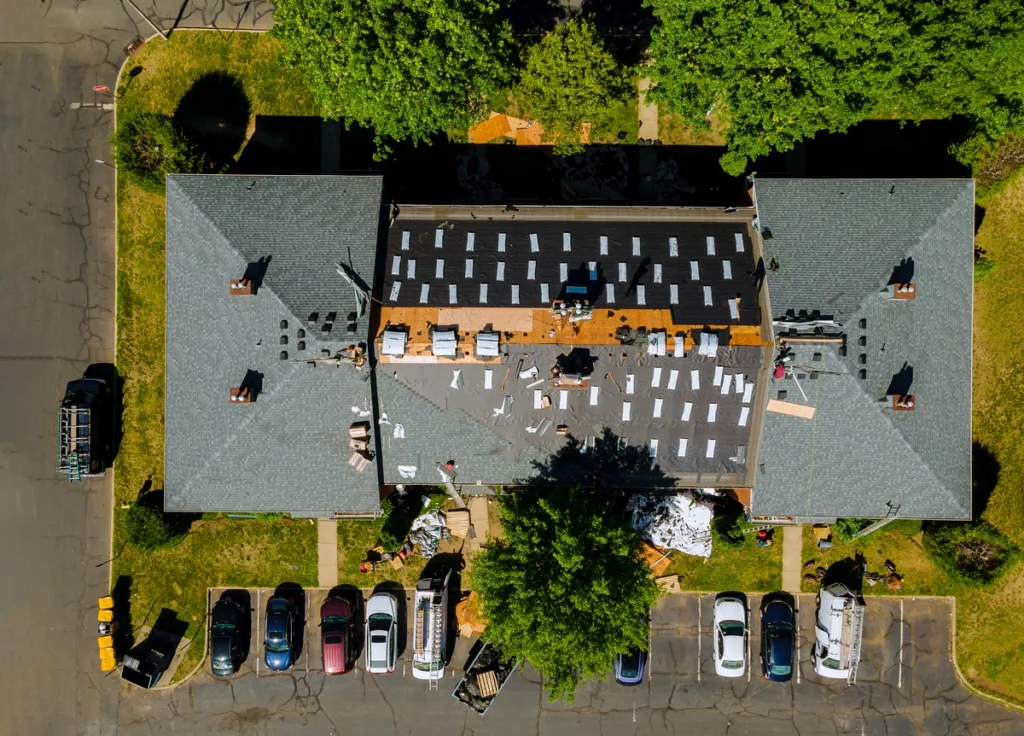
✅ 6 Steps to Install Roofing Underlayment

If you’re a hands-on homeowner or want to better understand your roofer’s process, here’s a step-by-step guide to proper roofing underlayment installation.
1. Prepare the Roof Deck
The first step is to prepare the roof deck thoroughly, as a proper foundation is essential for a durable roofing system. Start by inspecting the roof deck for any debris, dirt, or moisture. Use a broom or blower to clean the surface, ensuring no leaves, nails, or other materials are left behind. A clean and dry surface is critical to ensure the underlayment adheres correctly and performs as intended. Next, check for any protruding nails or screws from previous installations and remove them carefully to avoid puncturing the new underlayment. Patch up any holes, gaps, or damaged areas using a high-quality roofing repair compound or plywood, depending on the severity of the damage. A smooth, even surface will provide better support for the underlayment and prevent potential weak spots in the roofing system.
2. Roll Out the Underlayment
After preparing the roof deck, you can start rolling out the underlayment. Begin at the eaves, which is the edge of the roof closest to the gutters, as this is the lowest point where water drainage begins. Roll out the underlayment horizontally, working your way across the roof in even strips. Take your time to ensure it is laid flat without wrinkles or bubbles, as these imperfections can compromise the water resistance of the material. Allow for an overlap of about 2-4 inches between each row of underlayment to create a seamless and watertight barrier. This overlap is crucial to prevent water from seeping through the gaps, especially during heavy rains. Additionally, check that the underlayment aligns with the roof edges and trim any excess material for a clean finish.
3. Secure the Underlayment
Once the underlayment is rolled out, it’s time to secure it in place. This step is essential for ensuring the material stays firmly attached to the roof deck, even during strong winds or storms. Use nails or staples to fasten the underlayment, spacing them evenly along the edges and center of the material. Be cautious not to overdrive the fasteners, as this can tear the underlayment or create weak points. If you’re using a rubberized asphalt underlayment, it will have adhesive backing that self-seals when laid down, minimizing the need for additional fasteners. For extra security, especially in areas prone to high winds or heavy rainfall, you can double up on fasteners or use roofing tape to reinforce the edges. Properly securing the underlayment ensures that it stays in place and maintains its protective properties over time.
4. Cut Around Roof Features
Roof features such as vents, chimneys, skylights, or pipes require extra attention during the installation process. When you encounter these areas, carefully measure and cut the underlayment to fit snugly around them. Use a utility knife or scissors to make precise cuts, ensuring a tight fit that minimizes gaps. These sections are especially vulnerable to leaks, so take the time to apply additional layers of underlayment or waterproof flashing around the edges of these features. Flashing provides an extra barrier against water intrusion, redirecting it away from these critical areas. Seal the flashing with roofing adhesive or tape for added protection. Properly addressing roof features not only enhances the durability of the underlayment but also prevents common issues such as leaks or water damage in the long term.
5. Add the Final Layer
With the underlayment securely installed, you can move on to the final layer of roofing material. The material you choose—whether it’s shingles, tiles, or metal panels—will depend on your budget, aesthetic preferences, and the climate in your area. Carefully align the roofing material with the edges of the roof, starting at the eaves and working your way up toward the ridge. Each piece should overlap the one below it to create a watertight seal. If you’re installing shingles, follow the manufacturer’s guidelines for the correct pattern and spacing. For metal roofing or tiles, ensure that each piece is securely fastened with screws, nails, or clips designed for the material. Take care to trim any excess material and seal the edges for a polished and professional finish. The final layer not only provides the roof’s aesthetic appeal but also serves as the primary barrier against the elements.
6. Inspect the Roof
The final step in the installation process is a thorough inspection of the roof to ensure everything is properly installed and ready to withstand the elements. Walk around the roof carefully, checking for any gaps, overlaps, or loose sections in the underlayment and roofing materials. Pay special attention to areas around roof features, edges, and the ridge, as these are common spots for potential issues. Look for signs of wrinkles, tears, or bubbles in the underlayment, and address any problems immediately by re-securing or replacing the material. Similarly, check that the final layer of roofing material is properly aligned and firmly fastened. If you notice any damaged or misaligned pieces, fix them before concluding the project. A meticulous inspection ensures that your roof is fully protected and ready to handle harsh weather conditions, giving you peace of mind for years to come.
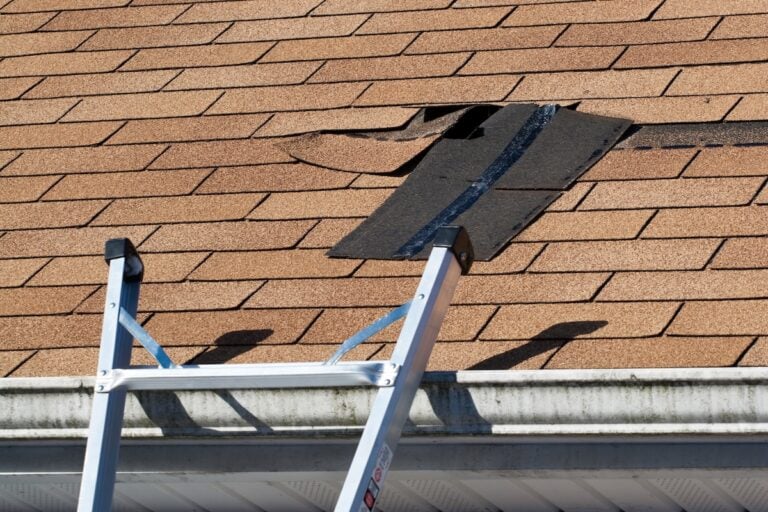
👉 Common Mistakes to Avoid When Using Roofing Underlayment

Even a small mistake during installation can lead to costly repairs down the line. Be sure to avoid these common errors when applying roofing underlayment.
1. Skipping the Overlap
Proper overlap between underlayment rows is essential for creating a watertight barrier. Without adequate overlap, gaps can form, allowing moisture to seep through and potentially damage the underlying structure of your roof. For best results, ensure that each row overlaps the previous one by the recommended amount, which is typically specified by the manufacturer. Taking the time to get this step right will significantly increase the durability and effectiveness of your roof.
2. Using the Wrong Fasteners
The type and quantity of fasteners you use play a crucial role in securing your underlayment. Using the wrong nails, staples, or an insufficient number of fasteners can cause the material to loosen over time, especially in areas prone to high winds or heavy rains. This can lead to leaks and structural damage. Always follow the manufacturer’s guidelines regarding the appropriate fasteners, as well as their placement, to ensure that your underlayment stays firmly in place.
3. Ignoring Roof Features
Roof features like vents, chimneys, and skylights can be tricky areas to seal, but neglecting to address them properly will compromise your roof’s water resistance. Water can easily seep through poorly sealed edges, leading to leaks and damage inside your home. Make sure to use specialized sealants, flashing, or additional underlayment layers around these features to create a secure, watertight finish that protects against the elements.
4. Cutting Corners with Quality
Opting for a lower-quality underlayment might seem like a good way to save money upfront, but it can lead to frequent repairs and replacements down the line. Cheap materials may lack the durability, water resistance, or UV protection needed for long-term performance. Investing in a high-quality underlayment from the start will give you better protection, peace of mind, and cost savings in the long run by minimizing the need for maintenance and preventing extensive damage.
🏡 Roofing Underlayment
When it comes to protecting your home, choosing the right roofing underlayment and the right team to install it makes all the difference. At Kenneth Daniel Roofing, we combine expertise, quality materials, and a customer-first approach to deliver roofing solutions you can depend on for years to come.
Your home deserves the best, and our team is here to ensure it gets just that. Ready to get started? Contact us today for a free consultation and let’s protect your home together!
EXPLORE OUR RECENT ARTICLES

We’re Redefining Roofing. You In?
