
5 Roof De Icing Cables for Leak Prevention (2026 Full Guide)
 1.21.26
 7 minutes read
Winter may look peaceful from the ground, but for your building, it can cause major damage—especially when snow melts, refreezes, and backs up into your roof system. That’s why roof de icing cables are one of the smartest investments property owners can make. These heating solutions reduce the risk of water intrusion and protect your structure through harsh winter cycles. If you’re not sure how your roof handles ice, start by reviewing our winter-prep recommendations on our commercial roofing resource page.
Here’s what you’ll learn in this guide:
- Why de-icing cables matter for leak prevention and safety
- 5 key steps to using and maintaining these systems correctly
- Tips on where and how to install for best performance
- How homeowners in Bracey and surrounding areas can stay winter-ready

Why Roof De Icing Cables Are Worth It
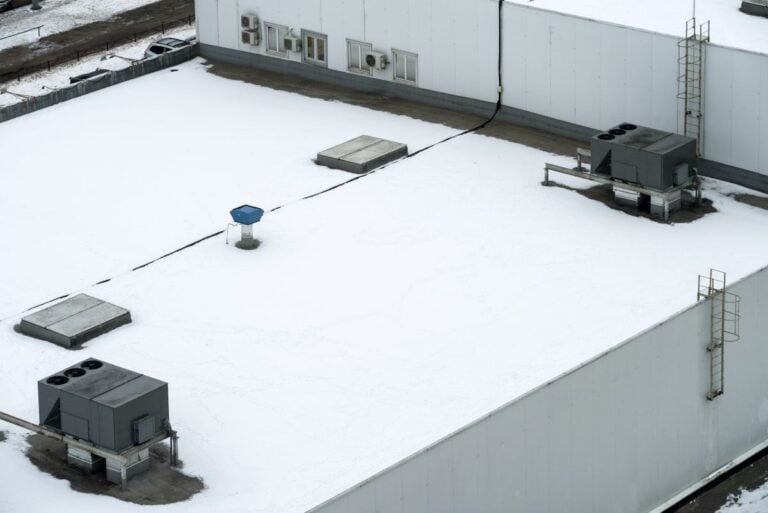
Roof leaks in winter often come from ice dams, not heavy rain. When melting snow can’t drain properly, water pushes up under shingles or flashing. In Bracey and surrounding areas, fluctuating temperatures make this a recurring threat. De icing cables help control the freeze-thaw cycle before it causes serious problems. Property owners dealing with winter-related damage can learn more about long-term solutions in this guide on commercial roof leak repair, which outlines how to address water intrusion before it worsens.
- Prevents ice dams: Heating cables melt snow along eaves and valleys so water can drain
- Reduces leaks: Prevents water from pooling and seeping into the structure
- Protects gutters: Stops frozen clogs that can split seams or pull gutters away
- Improves roof longevity: Avoids damage to shingles, decking, and underlayment
- Boosts safety: Prevents icicles and slippery zones near entrances and sidewalks
5 Steps to Use Roof De Icing Cables Effectively
Installing a cable is just the beginning. Here’s the right way to get long-term protection and performance.
1. Evaluate Ice Risk Areas First
Before installing any system, determine where ice buildup typically occurs.
- Eaves and gutters where cold air keeps snow from melting
- Roof valleys where snow collects and refreezes
- North-facing or shaded sections with slower melt rates
- Around dormers, skylights, and chimneys with added complexity
Mapping these zones ensures you only install cables where they’re actually needed—reducing energy waste and installation cost.
2. Choose the Right Type of Cable
Not all de icing cables are the same. Your roof type, layout, and snow load will determine what works best.
- Self-regulating cables: Automatically adjust heat output based on temperature
- Constant wattage cables: Deliver uniform heat along their length; ideal for consistent snow zones
- Plug-in kits: Great for short runs on small homes or outbuildings
- Hardwired systems: Best for large-scale commercial or complex roof layouts
Cables should be UL-listed, waterproof, and rated for outdoor roof use.
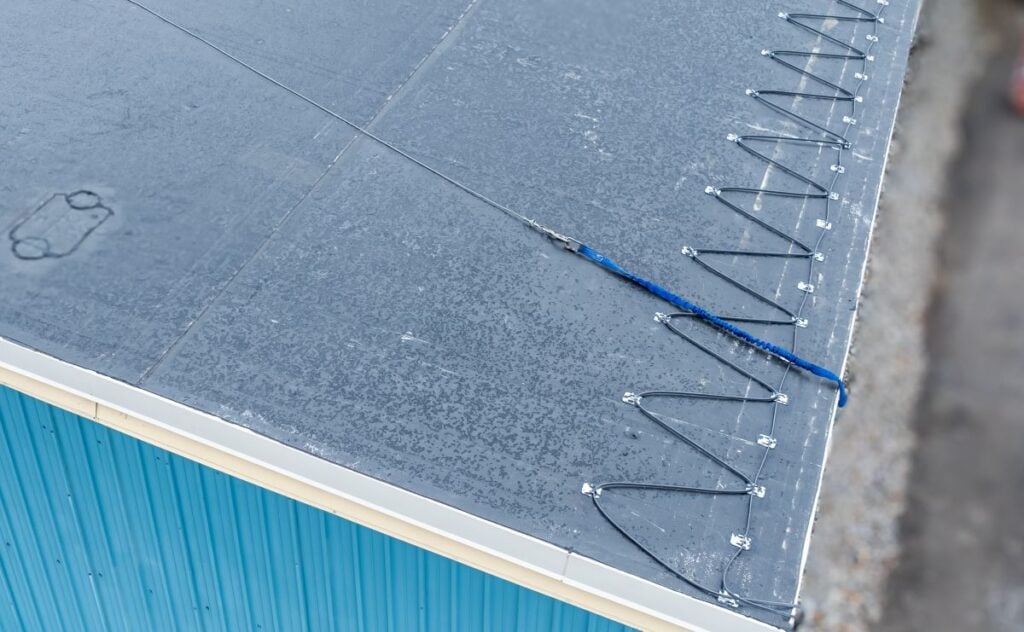
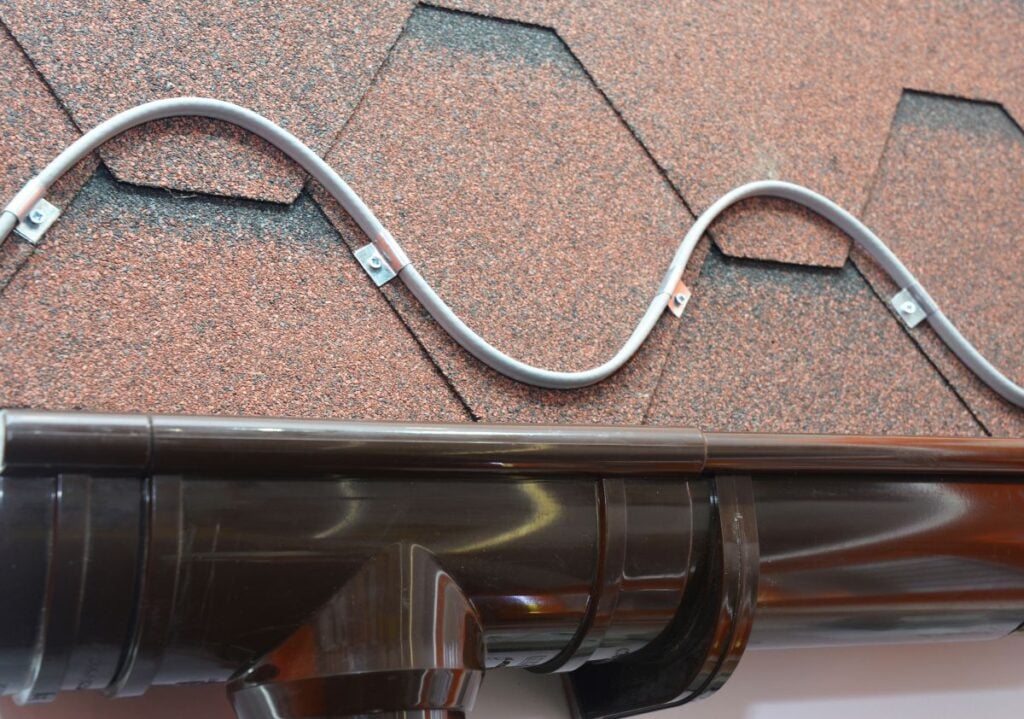
3. Follow Installation Best Practices
Improper installation can reduce effectiveness or even damage your roof. If in doubt, hire a qualified roofing contractor.
- Lay cables in a zigzag pattern along the eaves, with each bend reaching the overhang edge
- Extend cable down into gutters and about 1/3 of the downspout
- Attach with roof-safe clips, not nails or staples
- Avoid overlapping or touching cables, which could overheat
Test the system before winter hits to make sure everything functions properly.
4. Use a Timer or Thermostat Controller
Manually plugging in your de icing system wastes power and increases fire risk. Automation ensures consistent protection.
- Use a thermostat controller that activates the cable below 40°F with moisture present
- Or install a programmable timer based on your local freeze-thaw schedule
- Some advanced systems include snow sensors and Wi-Fi connectivity
With automation, you avoid running cables during dry or warm periods and save on your utility bill.
5. Inspect and Maintain Annually
Like any outdoor system, de icing cables need seasonal checkups.
- Look for frayed wires, loose connections, or exposed areas
- Ensure all clips are tight and the cable isn’t sagging
- Clean gutters to allow snowmelt to flow away from the roof
- Replace any damaged segments immediately to prevent shorts
An hour of maintenance in the fall can prevent thousands of dollars in water damage come spring. Scheduling a seasonal commercial roof inspection helps catch potential winter failures before they result in expensive emergency repairs.
Smart Placement Tips for Maximum Performance
Knowing where and how to install de icing cables makes a big difference. These tips help optimize heat coverage and prevent issues later on. usinesses can rely on experienced commercial roofing services in Littleton, NC to ensure de icing systems are installed safely and optimized for long-term winter protection.
Place at the Edge, Not the Center
The goal is to allow melted snow to drain—so cables belong near edges and transitions, not in the middle of your roof.
Work With Gravity
Install cables to follow natural flow paths. Water should be directed off the roof, into clear gutters, and away from your building.
Don’t Ignore Roof Valleys
Snow tends to pile and refreeze in valleys. Heating these areas prevents water from being trapped behind ice dams.
Mind the Pitch
Flat and low-slope roofs may require different cable layouts or supplementary heating options. Ask your contractor for solutions that fit your slope and material type.
Comparing De Icing Cables and Other Winter Tools
While cables are one of the most popular solutions for ice dams, they’re not the only option. Here’s how they stack up to other methods:
| Method | Effectiveness | Cost | Ease of Use | Maintenance | Best For |
| Roof De Icing Cables | High | Moderate | Easy | Low | Eaves, gutters, and roof valleys |
| Attic Insulation Upgrade | Medium | High | Professional | None | Preventing heat loss to roof deck |
| Ice Dam Steam Removal | High | High | Contractor | As needed | Emergency response |
| Roof Rakes | Low–Moderate | Low | Manual | None | Light snow on low-pitch roofs |
| Heated Gutter Guards | Medium | Moderate | Professional | Low | Preventing gutter clogs and icicles |
For many buildings in Bracey and surrounding areas, combining de icing cables with good attic insulation and seasonal gutter cleaning offers the best protection without excessive cost.
What Bracey Property Owners Should Know
In Bracey and surrounding areas, ice dams are a growing concern due to fluctuating winter temperatures. A snowstorm followed by sunny, cold days creates the perfect conditions for melt-and-freeze cycles that push water under your shingles. Property owners seeking expert guidance can explore trusted commercial roofing services in Bracey, VA to prepare their properties for harsh winter conditions.
Here are some local insights:
- Older buildings: Many homes and commercial properties built before 2000 lack the insulation and ventilation needed to prevent damming
- Metal roofs: Though great for snow-shedding, even metal systems can trap ice near eaves without cables
- Flat roofs: Need heating along internal drains and scuppers to prevent backups
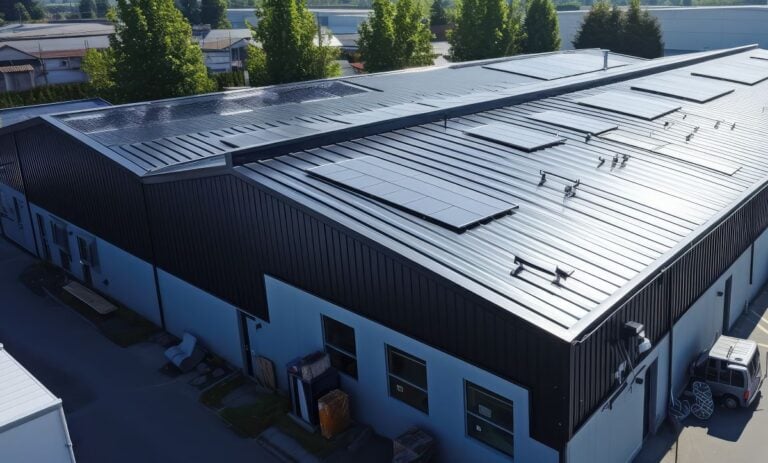
- Solar installations: Cables are especially useful when panels cause uneven snow melt
Roof de icing cables aren’t just a comfort upgrade—they’re a serious defense tool for winter resilience in southern Virginia.
Stay Protected with Kenneth Daniel Roofing
A leak from an ice dam can cause drywall stains, rotting rafters, and electrical hazards—all because water had nowhere to go. Roof de icing cables stop these issues before they begin. With proper installation and routine care, they help your building weather the winter safely and efficiently. Property owners can schedule dependable commercial roofing services in Lake Gaston, NC to safeguard their investment before the next storm arrives.
If your home or business in Bracey and surrounding areas is at risk for ice dams or leaks, contact us today to explore your options. Kenneth Daniel Roofing provides tailored solutions, safe installation, and expert advice to keep your property dry all winter long.
EXPLORE OUR RECENT ARTICLES

We’re Redefining Roofing. You In?
