
Metal Roof Patch: What Is the Best Way?
 2.5.25
 7 minutes read
Keeping your metal roof in pristine condition isn’t just about maintaining curb appeal—it’s about protecting your home from leaks, structural damage, and costly repairs. One of the most effective ways to address a minor roofing issue, like a small leak or damage, is with a metal roof patch.
If you’re wondering, “What’s the best way to patch a metal roof?”—you’ve come to the right place. This guide provides everything you need to know, from preparation to execution, to ensure your roof stays strong and reliable. Here’s what we’ll cover:
- Why metal roof patches are essential for lasting protection
- A step-by-step guide to patch your roof
- Common mistakes to avoid during the repair process
👉 Why a Metal Roof Patch is Crucial for Homeowners

Metal roofs are extremely durable—known to last decades—but no roofing system is invincible. Over time, weather conditions, poor maintenance, or poor installation can cause minor damage, such as small holes, surface cracks, or leaks. Patching these issues promptly and correctly prevents:
Water damage is a major concern for homeowners, but regular roof maintenance can prevent leaks from infiltrating your home’s interior. By addressing potential issues early, you protect the structure of your home from costly water-related problems.
Moisture can also lead to corrosion, especially on metal roofs. Proper care and repairs stop rust in its tracks, ensuring your roof remains strong and durable over time. This not only keeps your roof looking great but also preserves its functionality.
Fixing small problems as they arise helps extend the lifespan of your roof. By preventing wear and tear early on, you can avoid expensive repairs, such as replacing insulation or entire roof sections, saving you money in the long run.
Tools and Materials You’ll Need for the Job
Proper tools and high-quality materials can make a big difference in the performance of your repair. Here’s what you’ll need:
- Metal roofing patch
- Roofing screws or fasteners
- Tin snips or metal cutters
- Drill with a screwdriver attachment
- Silicone-based roofing sealant
- Sandpaper or wire brush
- Measuring tape and marker
- Ladder and safety harness
🧰 How to Patch a Metal Roof (6 Simple Steps)

Repairing your metal roof is a manageable task if you follow the right process. Here’s a clear, step-by-step guide to help you tackle the job:
1: Identify the Damage
Begin by thoroughly inspecting your roof for any visible signs of damage such as holes, cracks, or corrosion. Take your time to carefully examine the surface, as even small issues can lead to bigger problems if left unaddressed. To locate any active leaks, use a garden hose or spray bottle to simulate rainfall over the roof. Pay close attention to areas where water seeps through. Once you identify the damaged spots, mark them clearly with a marker or any visible marking tool. This ensures you won’t miss them during the repair process.
2: Gather Your Tools and Prep the Area
Before starting the repair, gather all the necessary tools and materials, such as a wire brush or sandpaper, roofing sealant, a metal patch, tin snips or metal cutters, and roofing screws. Begin by cleaning the damaged area thoroughly using the wire brush or sandpaper to remove any rust, old debris, or loose material. A clean surface is essential for the sealant and patch to adhere properly. Once cleaned, make sure the area is completely dry to prevent moisture from interfering with the repair process.
3: Cut the Metal Patch
Next, prepare the metal patch that will cover the damaged area. Use tin snips or metal cutters to cut a piece of metal that is about 2–4 inches larger than the damaged area on all sides. This extra size ensures complete coverage and adds more durability to the repair. After cutting the patch, file down the edges to remove any sharp corners or uneven sections that could pose a safety hazard or make the patch difficult to handle.
4: Attach the Patch
To attach the patch, begin by applying a generous layer of silicone-based roofing sealant around the entire damaged area. Make sure the sealant is spread evenly to create a strong bond. Carefully place the metal patch over the damage, pressing down firmly to ensure it adheres properly and the sealant spreads evenly underneath. To secure the patch in place, use roofing screws, spacing them approximately every 2 inches around the edges of the patch. This will hold the patch firmly in position and prevent it from moving or lifting over time.
5: Reseal the Area
Once the patch is securely attached, apply another layer of roofing sealant over the edges of the patch and all the screw heads. This extra layer of sealant serves as an additional waterproof barrier, ensuring that no water can seep through the repair. Smooth out the sealant as needed to create a uniform, watertight seal that will protect the roof from future leaks.
6: Inspect Your Work
After completing the repair, allow the sealant to dry completely, which usually takes around 24 hours. Once dry, carefully inspect the repaired area for any loose edges, gaps, or other imperfections that could allow water to leak through. Make sure the patch is secure, and all sealant is properly applied. A thorough inspection will give you confidence that the repair is durable and weatherproof.
⚠️ Common Mistakes to Avoid

Even with the best intentions, DIY roof patching has some pitfalls. Here are common mistakes and how to avoid them:
Using the Wrong Materials
When patching your roof, it’s crucial to use materials that match your roof type. For example, metal roofs require specific patching materials that won’t cause corrosion, while asphalt shingles need compatible adhesives. Using the wrong materials can result in damage, poor adhesion, or an unattractive finish. Always double-check compatibility before starting your repair.
Neglecting Surface Preparation
Skipping proper surface preparation is one of the most common mistakes in roof repair. Dirt, debris, or moisture on the surface can prevent sealants or adhesives from sticking effectively. Always clean and dry the area thoroughly before applying any patch materials. Taking the time for proper prep ensures a longer-lasting, more durable repair.
Undersized Patches
Using a patch that’s too small is a recipe for failure. A proper patch should extend well beyond the damaged area to fully cover it and prevent leaks. Experts recommend cutting patches at least two inches larger on all sides of the damage for optimal protection. A larger patch ensures complete coverage and reduces the risk of future issues.
Skipping Sealant Layers
Sealant is an essential part of roof repair, providing waterproofing and reinforcing the patch. Applying too little sealant or skipping it altogether can leave your roof vulnerable to leaks. Be generous with sealant and apply multiple layers if needed, allowing each to dry properly. This step is critical for ensuring your patch holds up under tough weather conditions.
Ignoring Safety Precautions
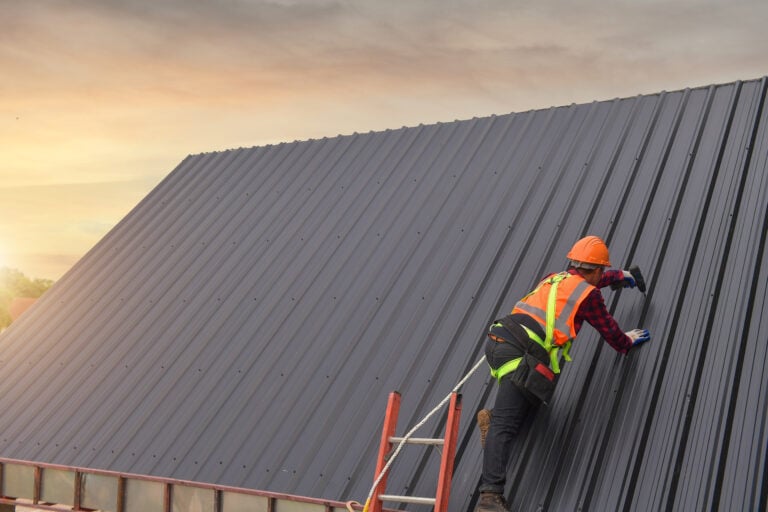
Roof repairs can be dangerous, especially on steep or high surfaces. Failing to use proper safety equipment, like a harness or sturdy ladder, puts you at serious risk of injury. If the area is particularly hard to reach or the slope is too steep, consider hiring a professional. Safety should always be your top priority when working on a roof.
🛠️ Metal Roof Patching
When it comes to metal roof patching, you need a team you can trust to deliver quality, reliability, and lasting results. At Kenneth Daniel Roofing, our experienced professionals, top-tier materials, and commitment to transparent service set us apart. Whether it’s a minor patch or a full-scale repair, we’re here to ensure your roof stays strong and secure.
Don’t wait for small issues to turn into costly problems—contact us today for your complimentary roof inspection and let us help protect your home.
EXPLORE OUR RECENT ARTICLES


We’re Redefining Roofing. You In?
