
How To Tarp A Roof? 7 Easy Steps
 3.7.25
 9 minutes read
When a storm damages your roof, every minute counts. Protecting your home from water damage, debris, and further weather exposure is critical, and tarping your roof can be a quick, temporary solution.
But how hard is it to tarp a roof? While it may seem daunting, with the right tools and guidance, it’s a manageable DIY task for many homeowners. This guide will walk you through everything you need to know about how to tarp a roof, from preparation to installation. Here’s what we’ll cover in this guide:
- Why and when you need to tarp a roof
- 7 steps to tarp a roof (with a numbered breakdown)
- What to do after tarping your roof
🤔 Why and When You Need to Tarp a Roof

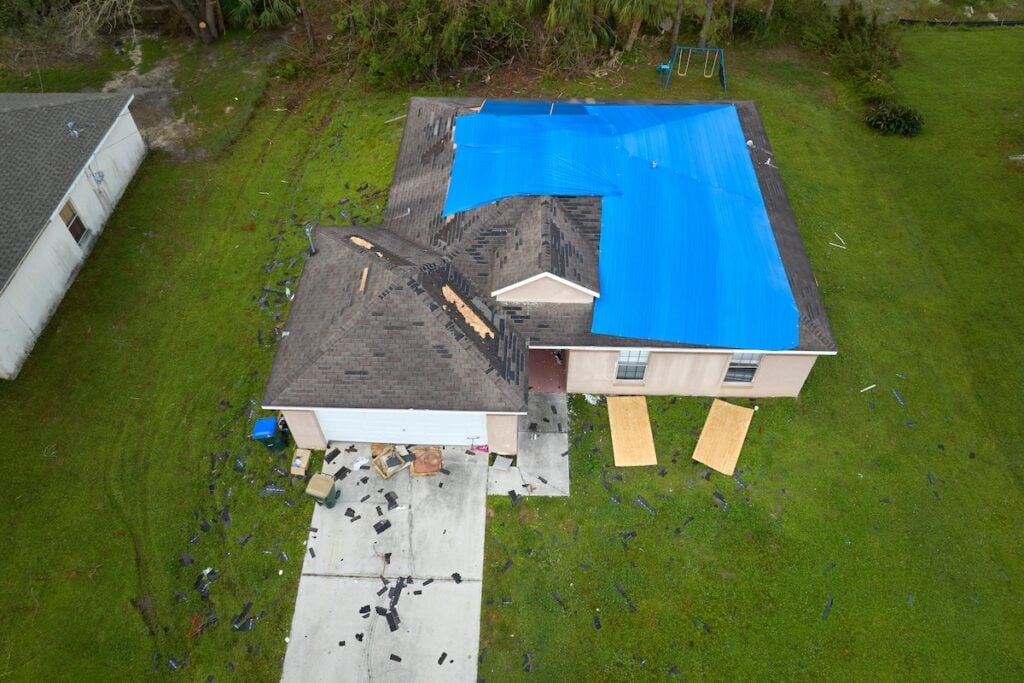
Tarping your roof is a crucial temporary fix after damage from storms, heavy winds, or fallen debris. It helps prevent further issues by protecting your home’s interior from leaks, mold, insects, or additional structural damage. Common scenarios for tarping include storm damage caused by high winds, hail, or falling branches that leave sudden openings in your roof. It’s also useful when professional repairs are delayed, giving you time until proper fixes can be made, or for waterproofing between seasons while awaiting long-term solutions.
While tarping is an effective short-term measure, it’s important to remember that it’s not a substitute for professional repair. Addressing the root cause of the damage with the help of experts is essential for maintaining your home’s safety and structural integrity.
Tools and Materials You’ll Need
- A durable roof tarp (preferably waterproof and UV-resistant).
- Several 2×4 wooden planks to help secure the tarp.
- A ladder that provides safe access to your roof.
- A measuring tape to figure out the size of the damaged area.
- Safety gear, such as gloves and non-slip shoes.
- Nails or screws and a hammer or drill to keep the tarp in place.
- A utility knife for trimming the tarp.
✅ 7 Steps to Tarp a Roof
Tarping a roof doesn’t have to be overwhelming. Follow these easy steps to secure your roof and protect your home.
1. Assess the Damage
Begin by closely observing the damaged area from the ground to get an initial sense of the extent of the problem. Look for visible signs of damage, such as missing shingles, cracks, or holes. If it’s safe to do so, use a sturdy ladder to climb onto the roof for a closer inspection. Make sure to wear proper safety gear, such as non-slip shoes and possibly a harness, to avoid accidents. Measure the size of the damaged section carefully, taking note of any additional areas that might also need coverage. It is a good idea to add extra space around the damage when planning your repair to ensure the problem area is completely covered.
2. Measure and Cut the Tarp
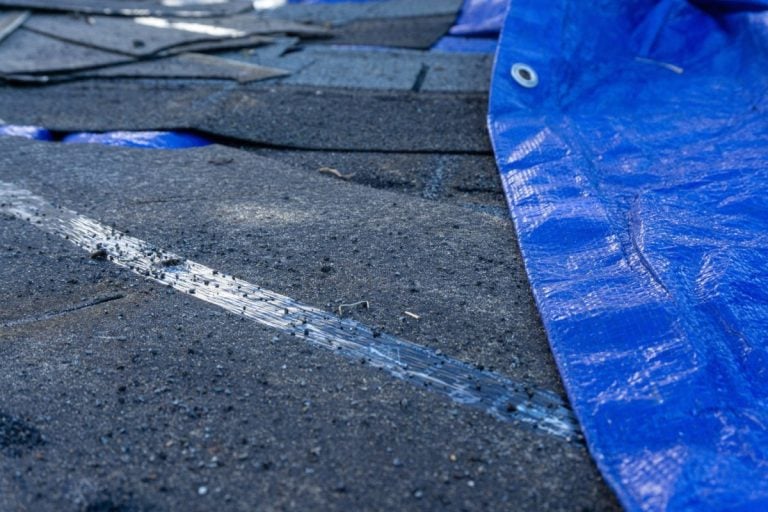
After identifying the size of the damaged area, select a tarp that is large enough to adequately cover it, keeping in mind the need for extra overlap. Lay the tarp out flat on a clean surface and carefully measure it to match the area you intend to protect. As a best practice, add an additional 3–4 feet on all sides to ensure complete coverage. The extra overhang provides an added layer of protection against water seeping in around the edges during heavy wind or rain. Use sharp scissors or a utility knife to cut the tarp cleanly to the required size.
3. Lay Out the Tarp
Take the measured and cut tarp and carefully position it over the damaged area of the roof. Make sure it fully extends beyond the edges of the damaged section, including the extra overlap you added earlier. This ensures maximum coverage and helps prevent water from sneaking underneath the tarp. Take your time to smooth out the tarp, removing any wrinkles, folds, or creases. These imperfections can create pockets where water can pool, potentially leading to further damage or leaks. Adjust the tarp as needed to ensure it lies flat and evenly across the roof.
4. Secure with Wooden Planks
To prevent the tarp from shifting or blowing away, use 2×4 wooden planks to secure its edges. Lay the wooden planks along the perimeter of the tarp, ensuring they run parallel to the edges of the roof. Take one edge of the tarp and roll it tightly around the plank to create a secure hold. This rolling technique helps anchor the tarp and adds weight to keep it in place. Repeat this process on all sides of the tarp to ensure the entire area is evenly secured. This step is crucial for keeping the tarp stable during strong winds or storms.
5. Nail or Screw Down Securely
Once the wooden planks are in position and the tarp is tightly wrapped around them, secure the planks to the roof using nails or screws. Use a hammer or drill to fasten the planks firmly, spacing the nails or screws evenly along the length of each plank. This added weight and attachment ensure that the tarp remains firmly in place, even during adverse weather conditions. Be cautious when driving in nails or screws to avoid causing further damage to your roof. Make sure the tarp is pulled taut while securing it to prevent flapping or movement in high winds.
6. Anchor the Tarp’s Leading Edge
For maximum waterproofing, extend the tarp’s leading edge over the peak of the roof. This ensures that water flows down and away from the damaged area rather than pooling on or under the tarp. To anchor this leading edge, secure it to the opposite side of the roof using additional planks, nails, or screws. This provides extra stability and prevents the tarp from slipping or shifting. Properly anchoring the leading edge is critical to creating a watertight barrier that protects your roof and home from further damage.
7. Verify Stability and Adjust
Once all edges are secured, carefully inspect the tarp to verify that it is stable and properly positioned. Walk around the roof (if it is safe to do so) or observe from the ground to check for any gaps, wrinkles, or loose edges where water might seep through. Make any necessary adjustments, such as tightening the tarp, re-securing planks, or addressing areas that appear vulnerable. A properly secured tarp should lie flat and tight across the roof with no loose material flapping in the wind. Regularly monitor the tarp over time to ensure it remains intact until permanent repairs can be made.
🛠️ What to Do After Tarping Your Roof
Once your roof is tarped and your home is protected, it’s time to focus on the long-term fix. Here are your next steps:
Document the Damage
Start by thoroughly documenting the damage to your roof. Take clear, high-resolution photos of all affected areas, including close-ups of the damage and wider shots to show the overall condition of your roof. Be sure to capture any punctures, missing shingles, or areas where the structure is exposed. Additionally, take pictures of the tarp installation to show the temporary measures you’ve taken to prevent further damage. These images are essential for your insurance claim as they provide solid evidence of the damage and the steps you’ve taken to mitigate it. Don’t rush—take photos from multiple angles and ensure you don’t miss any sections. If possible, include timestamps on your photos to establish when the damage occurred. This level of detail will also be helpful later when consulting with repair professionals or roofing contractors to fully assess the situation.
Call Your Insurance Company
Once you’ve documented the damage, the next step is to contact your insurance company promptly, especially if the damage is the result of a covered event like a storm, hail, or other natural disaster. Many insurance policies require timely reporting, so don’t delay. Provide your insurer with the photographs you’ve taken, along with a detailed description of the event that caused the damage. Be prepared to answer questions about when the damage occurred, the extent of the damage, and any temporary measures you’ve taken, such as installing a tarp. Your insurance company may assign an adjuster to inspect the damage in person, so ensure you keep all relevant documentation, including receipts for temporary repairs or expenses, organized and easily accessible. Being proactive and transparent during this process will help ensure your claim is processed smoothly and efficiently.
Schedule Professional Repairs
Tarping your roof is only a temporary solution, so it’s crucial to arrange permanent repairs as soon as possible to prevent further issues like water leaks or structural damage. Contact multiple licensed roofing professionals to schedule inspections and gather estimates for the repair. When selecting a contractor, ensure they are experienced, insured, and have a solid reputation for quality work. During their assessment, ask questions about the scope of the repair, the materials they recommend, and the expected timeline for completion. Acting quickly is key, as the longer the damage remains, the more likely it is to worsen, potentially leading to higher repair costs or additional damage to your home’s interior. Don’t forget to keep your insurance company in the loop, as they may need to approve the repairs or reimburse you for costs. Taking swift action will ensure your roof is restored effectively, protecting your home and family in the long term.
🏠 Roof Tarping Guide
While tarping your roof can provide a quick temporary solution, ensuring your home is fully protected requires professional expertise. That’s where our team at Kenneth Daniel Roofing comes in. With reliable service, expert craftsmanship, and a deep commitment to our community, we’re the trusted choice for storm damage repairs.
Don’t leave your roof—and your home’s safety—to chance. Contact Kenneth Daniel Roofing today for a free inspection and let us handle the rest!
EXPLORE OUR RECENT ARTICLES
We’re Redefining Roofing. You In?
