
How to Remove Vinyl Siding (Process, Safety Tips, & More)
 10.14.25
 8 minutes read
If you’ve been considering upgrading your home’s exterior in Richmond, VA and surrounding areas, knowing how to remove vinyl siding properly is a critical first step. Whether you’re repairing damaged panels, upgrading insulation, or preparing for a complete siding replacement, taking the right approach ensures your project goes smoothly and safely. Many homeowners underestimate just how detailed this process can be, from handling fragile panels to dealing with potential water damage underneath.
If you plan to replace your current siding after removal, learn more about expert siding installation and repair services that can help restore your home’s look and energy efficiency.
Here’s what you’ll learn in this guide:
- Why removing vinyl siding the right way matters
- Step-by-step instructions for safe and effective removal
- Common mistakes to avoid during the process
- How to prepare for new siding installation or repairs
Why Proper Vinyl Siding Removal Matters
While vinyl siding is designed for long-term durability, improper removal can cause damage to both the siding panels and your home’s exterior walls. Understanding the importance of doing it right helps protect your investment and ensure long-lasting results.
- Protects the structure underneath: Removing siding correctly prevents tearing away sheathing or damaging the weather barrier, both of which protect your home from moisture intrusion.
- Saves time and money: Efficient removal keeps reusable panels intact and reduces replacement costs.
- Prevents safety hazards: Proper technique avoids sharp edges, falling panels, or ladder accidents during the process.
- Prepares for smoother installation: Whether you’re repairing or replacing, a clean, damage-free surface ensures new siding installs securely.
- Reveals hidden issues: Carefully removing panels allows you to inspect for mold, rot, or insect damage before reinstallation.
Homeowners in Richmond, VA and surrounding areas often find that proper removal not only helps maintain curb appeal but also protects their home’s long-term performance.
6 Steps to Remove Vinyl Siding Safely and Effectively
Vinyl siding removal might seem straightforward, but each step requires attention to detail. Following a systematic approach ensures your panels stay intact and your walls remain protected.
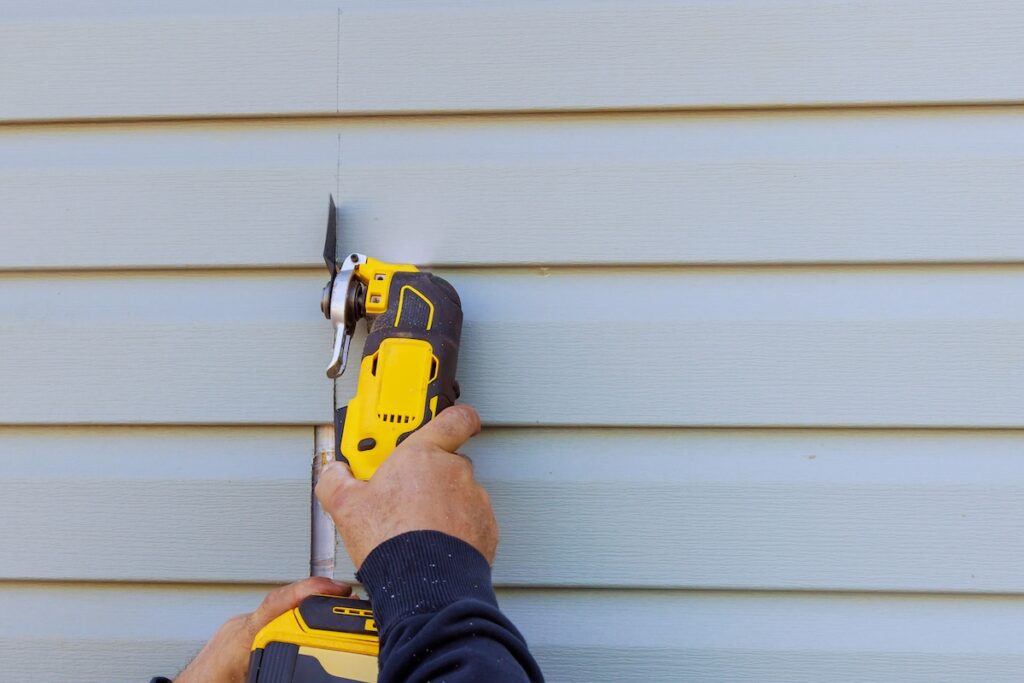
1. Gather the Right Tools
Before starting, make sure you have the correct tools on hand. Having everything ready helps you work efficiently and reduces the risk of damaging the siding.
You’ll need:
- Zip tool (also called a siding removal tool)
- Pry bar or flat-head screwdriver
- Utility knife
- Work gloves and safety glasses
- Ladder or scaffolding for higher sections
A zip tool is essential—it’s designed to unhook the interlocking edges of vinyl siding without cracking them.
2. Start with a Visual Inspection
Before you remove any panels, inspect the siding to identify loose or damaged areas. Pay close attention to corners, trim, and areas around windows or doors.
- Look for cracked, warped, or brittle panels that might break during removal.
- Check for signs of water damage, such as discoloration or swelling.
- Make note of any panels you may want to reuse or replace.
This inspection helps you plan the order of removal and anticipate potential challenges.
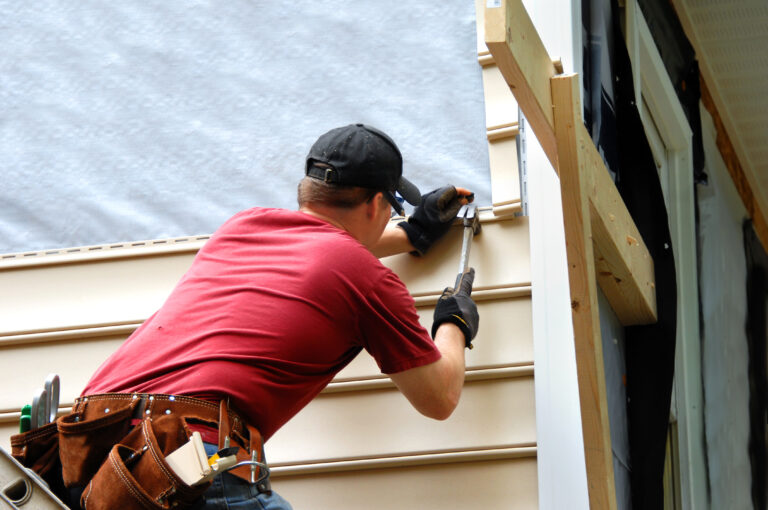
3. Unlock the Bottom Edge
Vinyl siding panels interlock, with each piece overlapping the one below it. To remove a panel, you must first unlock this connection.
- Insert the zip tool under the bottom lip of the panel above the one you want to remove.
- Gently pull down and out to unhook the interlocking edge.
- Work horizontally across the panel until it’s completely unzipped.
Tip: Move slowly and steadily to prevent bending or snapping the vinyl.
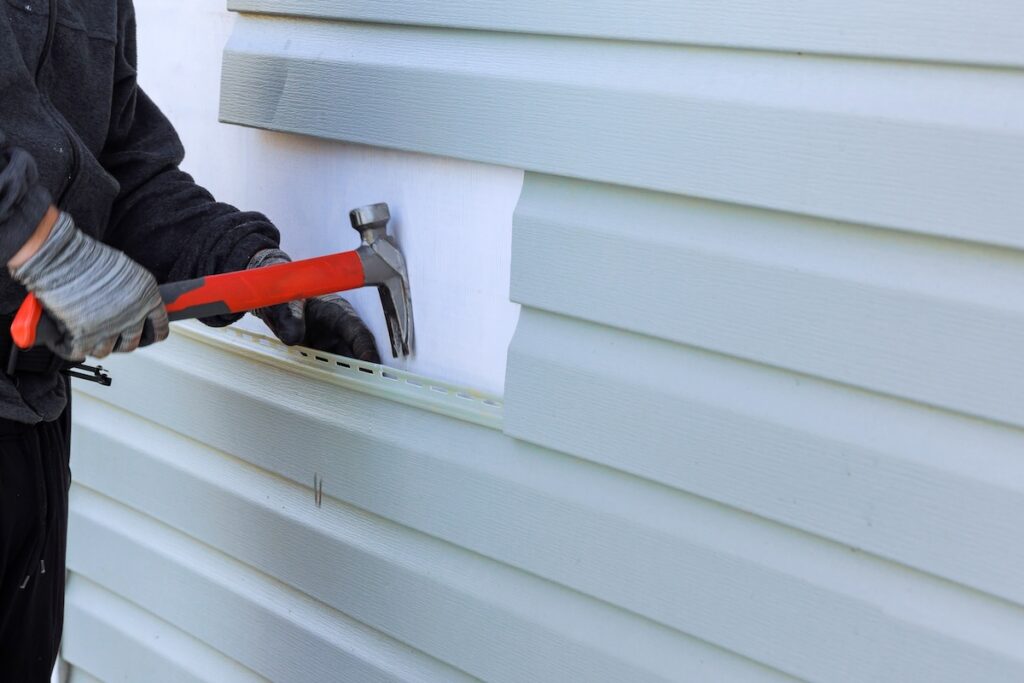
4. Remove the Nails or Fasteners
Once unzipped, you’ll expose the nails or screws securing the panel to the wall.
- Use a pry bar or hammer claw to gently remove nails.
- If screws are used, a drill or screwdriver can make removal faster.
- Start from one end and work toward the other, supporting the panel as you go.
Keep fasteners in a container—you may need them later for reinstalling panels or securing trim.
5. Detach and Label Each Panel
After removing the nails, lift the panel off carefully. If you plan to reuse it, labeling each piece helps you reinstall in the correct order.
- Stack panels in a flat, shaded area to prevent warping.
- Use masking tape and a permanent marker to number each one sequentially.
- Avoid placing heavy objects on top of vinyl panels—they can bend easily.
This organization step can save hours of confusion later, especially during reinstallation.
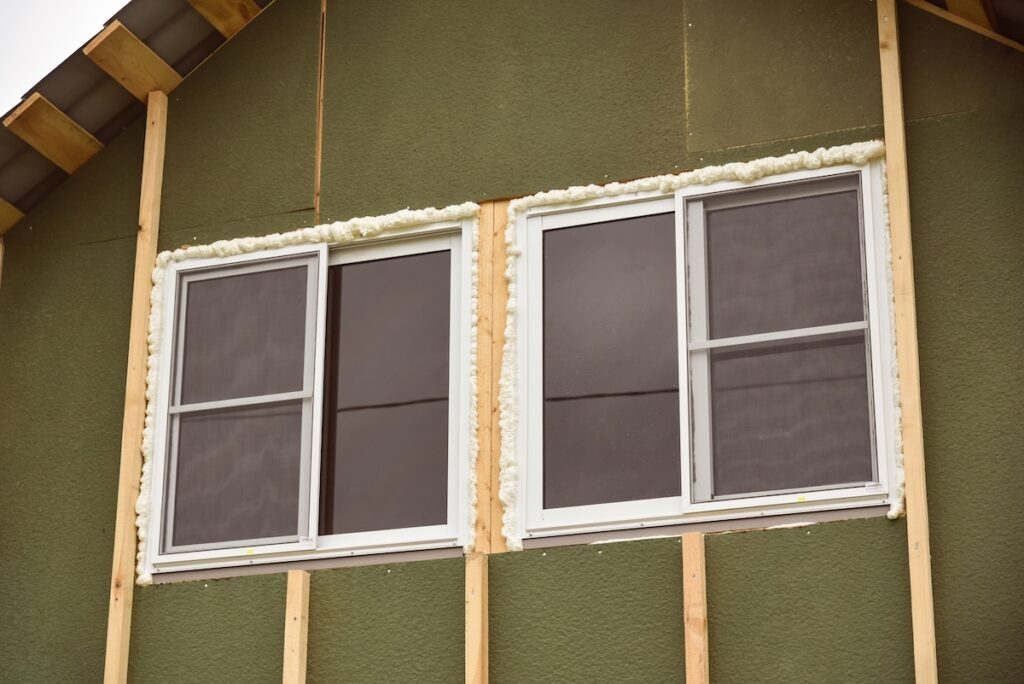
6. Inspect the Wall Surface Beneath
Once all panels are off, take time to assess the condition of the sheathing, insulation, and weather barrier. This is your chance to spot issues before installing new siding.
Look for:
- Mold or mildew buildup
- Signs of rot or insect infestation
- Loose or missing nails and seams in the sheathing
If you notice damage, have it repaired before reinstalling siding. It’s much easier to address structural problems now than after new panels are in place.
Safety Tips Every Homeowner Should Know
Working with siding involves ladders, sharp tools, and fragile materials, so safety must come first. Whether you’re tackling a small section or a full exterior, keep these precautions in mind.
Protect Yourself and Others
- Wear gloves, eye protection, and sturdy footwear.
- Avoid working in windy conditions that could cause panels to shift or fall.
- Have a second person assist you, especially when handling long or high panels.
Work Smart on Ladders
- Always place ladders on solid, level ground.
- Keep your body centered between the ladder rails.
- Move the ladder frequently rather than overreaching.
Handle Materials Carefully
Vinyl can become brittle in cold weather. If possible, schedule removal for mild temperatures to reduce cracking. Keep panels shaded if working under intense sun to avoid softening or warping.
Homeowners in Richmond, VA and surrounding areas often experience seasonal changes that affect siding flexibility. Plan your project around local weather for best results.
Preparing for New Siding Installation
Once the old panels are removed, proper preparation sets the stage for a successful new installation. Skipping this step can lead to long-term issues such as moisture intrusion or uneven siding.
Clean and Repair the Surface
- Remove leftover nails, caulk, and debris.
- Patch any holes or gaps in the sheathing.
- Replace damaged sections of insulation or vapor barrier.
A clean, even surface allows new siding to lay flat and secure.
Check Insulation and Ventilation
Proper insulation behind siding helps maintain energy efficiency. Consider adding or upgrading insulation during this step.
- Use rigid foam board or house wrap for added protection.
- Ensure soffit vents and attic ventilation remain unobstructed.
Choose the Right Replacement Siding
If you’re replacing panels, take time to evaluate new materials. Vinyl remains a popular choice, but fiber cement, engineered wood, or insulated vinyl can also offer excellent performance.
Compare options for:
- Durability: Resistance to fading, cracking, and weathering.
- Maintenance: Cleaning requirements and longevity.
- Style: Color and texture options that complement your home.
Your siding contractor can help you choose materials that fit your home’s needs and climate.
Common Mistakes to Avoid During Vinyl Siding Removal
Even experienced DIYers make errors when handling vinyl siding. Avoiding these mistakes helps preserve both your siding and your home’s exterior.
- Removing Too Forcefully: Vinyl siding is flexible but not indestructible. Pulling too hard can crack panels or damage the interlocking edges, making them unusable.
- Using the Wrong Tools: Improvising with a screwdriver or knife instead of a zip tool can cause uneven pressure and break the siding. Always use a proper siding removal tool.
- Ignoring Weather Conditions: Extreme temperatures can make vinyl brittle or pliable. Work during moderate weather for best handling and safety.
- Failing to Label Panels: If you plan to reinstall the same siding, failing to mark each panel’s position creates confusion later. Keep panels organized from start to finish.
- Overlooking Structural Issues: Never reinstall siding over rot, mold, or loose sheathing. Take the opportunity to fix any underlying issues before proceeding.
Homeowners in Richmond, VA and surrounding areas who handle removal carefully often find the reinstallation process faster, safer, and more efficient.
Take the Right Steps for a Safe, Successful Project
Learning how to remove vinyl siding properly gives you confidence to tackle maintenance or prepare for a full exterior upgrade. With careful planning, the right tools, and attention to safety, homeowners in Richmond, VA and surrounding areas can handle the process effectively while preserving their home’s structure.
If your siding is worn, cracked, or showing signs of age, professional help ensures your home’s exterior stays strong and beautiful. For expert installation, repairs, or replacement options tailored to your property, contact us today to schedule a consultation with a trusted local team.
EXPLORE OUR RECENT ARTICLES

We’re Redefining Roofing. You In?
