
 (434) 252-3783
 Articles

How Long Do Roof Shingles Last? (Homeowner’s Guide)
 7.10.24
 5 minutes read
Homeowners have many responsibilities when it comes to maintaining their homes. From checking the plumbing to ensuring the windows are sealed, here are a few things that homeowners need to remember:
- Seasonal HVAC maintenance
- Lawn and garden care
- Cleaning gutters and downspouts
- Inspecting plumbing for leaks
- Checking the seals on windows and doors
While it may not be the first thing that comes to your mind, regular roof upkeep is vital to the long-term health and wellbeing of your home. Keep the following factors in mind when determining the lifespan of your shingle roof.
Material Type
The type of shingle used on your roof has the biggest impact on your roof’s projected lifespan. Here are the five most popular types of roof shingles and their average lifespans:
1. Asphalt Shingles
The most common type of roofing material in the United States, asphalt shingles, generally last between 15 to 30 years. They are affordable and easy to install, making them a popular choice among homeowners.
This type of shingle is commonly called 3-tab because it comes in three separate tabs that are each 12 inches wide. The shingles also have a flat appearance with square cutouts along the bottom edge.
2. Architectural Shingles
Architectural shingles, also known as dimensional or laminate shingles, are a premium type of asphalt shingle. They can last between 25 to 30 years due to their thicker and more durable construction.
While 3-tab shingles tend to have one layer of asphalt, architectural shingles have two or more layers, which makes them better able to withstand harsh weather conditions.
3. Wood Shingles/Cedar Shake Shingles
Wood shingles or cedar shake shingles offer a rustic and natural look that can last between 20 to 40 years. However, their longevity largely depends on proper maintenance and the local climate.
4. Metal Shingles
Metal shingles are known for their durability and longevity, lasting between 40 to 70 years. They are resistant to extreme weather conditions, making them suitable for various climates.
5. Slate Tile Roofs
Slate tile roofs are one of the longest-lasting roofing materials, with a lifespan ranging from 50 to 100 years. They are incredibly durable but also one of the more expensive options. Slate tile roofs have been in use for centuries, with some historic buildings still having their original slate roofs intact.

Climate and Weather
The weather and overall climate can impact the longevity of your shingle roof. Here’s how different climates affect various shingle materials:
Hot and Dry Climates
In hot and dry climates, such as the southwestern United States, asphalt shingles may wear out faster due to prolonged exposure to high temperatures and UV rays. Metal shingles are a better option for these climates as they reflect sunlight and withstand high temperatures.
Cold and Snowy Climates
In cold and snowy climates, shingles need to withstand heavy snowfall and freezing temperatures. Architectural shingles and slate tiles are more suitable for these regions due to their durability and resistance to cracking under the weight of snow.
Humid and Rainy Climates
Humid and rainy climates can lead to issues such as moss and algae growth on roofs. Wood shingles are prone to rot in these conditions, making asphalt or metal shingles a better choice for areas with high humidity and frequent rainfall.
Windy and Storm-Prone Areas
In areas prone to strong winds and storms, shingles with higher wind resistance ratings, such as architectural shingles or metal shingles, are recommended. These materials can better withstand the impact of high winds and flying debris.
Landscaping
The way you keep your yard and general landscaping can impact the health of your roof, especially if you have overhanging trees. Here are a few tips to maintain your landscaping and elongate the projected lifespan of your roof:
- Trim Overhanging Branches: Overhanging branches can rub against shingles, causing damage and increasing the risk of falling branches during storms. Regularly trim back any branches that hang over your roof to prevent this.
- Keep Gutters Clean: Clogged gutters can lead to water pooling on your roof and cause leaks. Ensure your gutters and downspouts are clean and free of debris, such as leaves and twigs, to promote proper drainage.
- Remove Debris from Roof: Leaves, pine needles, and other debris can accumulate on your roof, trapping moisture and leading to mold or rot. Regularly remove any debris from your roof to keep it dry and in good condition.

Routine Maintenance
Routine maintenance can extend the lifespan of your roof. Here are some common maintenance tasks you should perform and how to do them well:
- Regular Inspections: Inspect your roof at least twice a year, in the spring and fall, to identify any potential issues early. Check for missing, cracked, or curling shingles, and look for signs of water damage or mold growth.
- Clean Your Roof: Keep your roof clean by removing debris and moss. Use a soft brush or leaf blower to clear debris, and consider using a moss remover or hiring a professional for safe and effective moss removal.
- Address Repairs Promptly: If you notice any damage during your inspections, address repairs promptly to prevent further issues. Replace missing or damaged shingles, seal any leaks, and fix flashing around chimneys and vents.
- Professional Maintenance: Consider hiring a professional roofing company for an annual inspection and maintenance. They can provide expert advice and perform tasks that may be difficult or dangerous for homeowners to do themselves.
Choose Shingles for Your Home
Maintaining your roof is crucial for the long-term health of your home. By understanding the factors that impact your roof’s lifespan, such as material type, climate, landscaping, and routine maintenance, you can ensure your roof lasts as long as possible.
However, no matter how well you treat your roof, there will come a time when a full roof replacement is necessary. When that time comes, reach out to Kenneth Daniel to get on our books and get the shingle roof of your dreams!
What Are Composite Roof Shingles? (Homeowner’s Guide)
7.5.24
5 minutes read
When deciding what kind of shingles to use for your roof, you have a lot of considerations to keep in mind. Here are five key factors to consider:
- Durability – How long will the shingles last?
- Cost – What is the upfront cost and long-term value?
- Aesthetics – How will the shingles look on your home?
- Maintenance – How much upkeep will the shingles require?
- Environmental Impact – Are the shingles eco-friendly or recyclable?
Composite shingles are often considered to be the best choice among asphalt shingles, balancing budget-friendliness with durability. In this guide, we’ll discuss what composite roof shingles are and why you should consider using them in your next roofing project.
What Are Composite Roof Shingles?
Composite roof shingles, also known as synthetic or engineered shingles, are a modern roofing material designed to offer enhanced performance and aesthetics over traditional asphalt shingles. These shingles consist of a combination of materials, typically including fiberglass, recycled plastics, and minerals, which are engineered to mimic the appearance of natural roofing materials like wood, slate, and tile.
Manufacturing Process
The manufacturing process starts with the selection of base materials, which typically include fiberglass matting, recycled plastics, and mineral fillers. These materials are carefully chosen to provide strength, flexibility, and weather resistance.
Once the base materials are prepared, they are coated with asphalt to add an extra layer of protection against moisture and UV rays. This asphalt coating also helps to bind the materials together, ensuring that the shingles remain intact even under harsh weather conditions.
After the asphalt coating, the shingles are often topped with colored granules made from minerals. These granules not only enhance the aesthetic appeal but also provide additional protection against the elements. Finally, the shingles are cut into the desired shapes and sizes and undergo rigorous quality control checks to ensure they meet industry standards.
Lifespan and Maintenance Needs
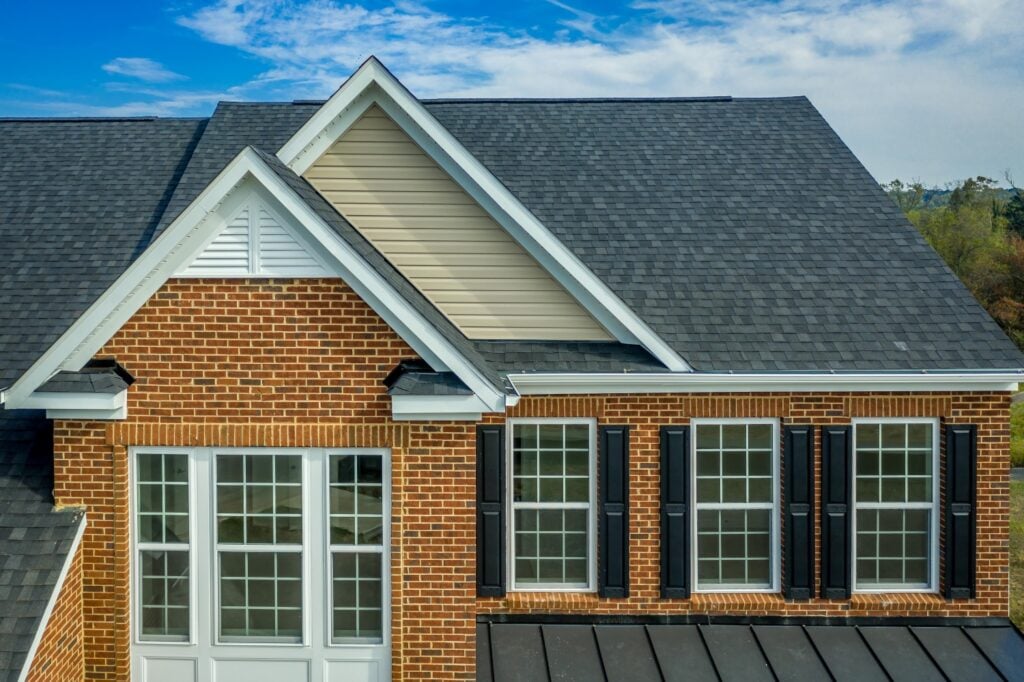
Composite roof shingles are known for their impressive lifespan, often lasting between 30 to 50 years. However, their longevity can be influenced by several factors, including climate, foliage, and overall maintenance.
To ensure your composite shingles last as long as possible, regular maintenance is essential. Annually, it’s crucial to inspect your roof for any signs of damage, such as cracks, missing granules, or loose shingles. Cleaning your roof to remove debris like leaves and branches can prevent moisture buildup and mold growth. Additionally, trimming overhanging tree branches can reduce the risk of physical damage during storms and minimize shade, which can promote algae growth.
Cost
The cost of installing composite roof shingles can vary depending on several factors, including the size of your roof, the complexity of the installation, and regional labor rates. On average, homeowners can expect to pay between $5 to $12 per square foot for composite shingles, including installation. For an average-sized home, this translates to a total cost ranging from $10,000 to $24,000.
In addition to the cost of materials and installation, it’s important to consider the expense of removing your old roof. This step is often necessary to ensure a clean and secure installation of the new shingles. The cost of roof removal can range from $1 to $5 per square foot, depending on the condition and type of the existing roofing materials.
While the upfront cost of composite shingles may be higher than traditional asphalt shingles, their durability and low maintenance requirements can result in long-term savings. Additionally, many homeowners find the investment worthwhile due to the aesthetic and performance benefits offered by composite shingles.
Warranties and Insurance
When investing in a new roof, understanding the warranties and insurance coverage associated with composite shingles is crucial. Most manufacturers offer warranties that range from 30 to 50 years, providing peace of mind that your investment is protected. These warranties typically cover defects in materials and workmanship, ensuring that you receive a high-quality product.
In addition to manufacturer warranties, some roofing contractors offer workmanship warranties that cover the installation process. These warranties can vary in length but often range from 5 to 10 years. It’s important to review the terms and conditions of both manufacturer and contractor warranties to understand what is covered and any potential limitations.
From an insurance perspective, composite shingles are often considered a favorable option due to their durability and resistance to weather-related damage. Many insurance companies offer discounts on homeowners’ insurance premiums for roofs made from composite materials, recognizing their ability to withstand harsh conditions and reduce the risk of claims.
Aesthetics
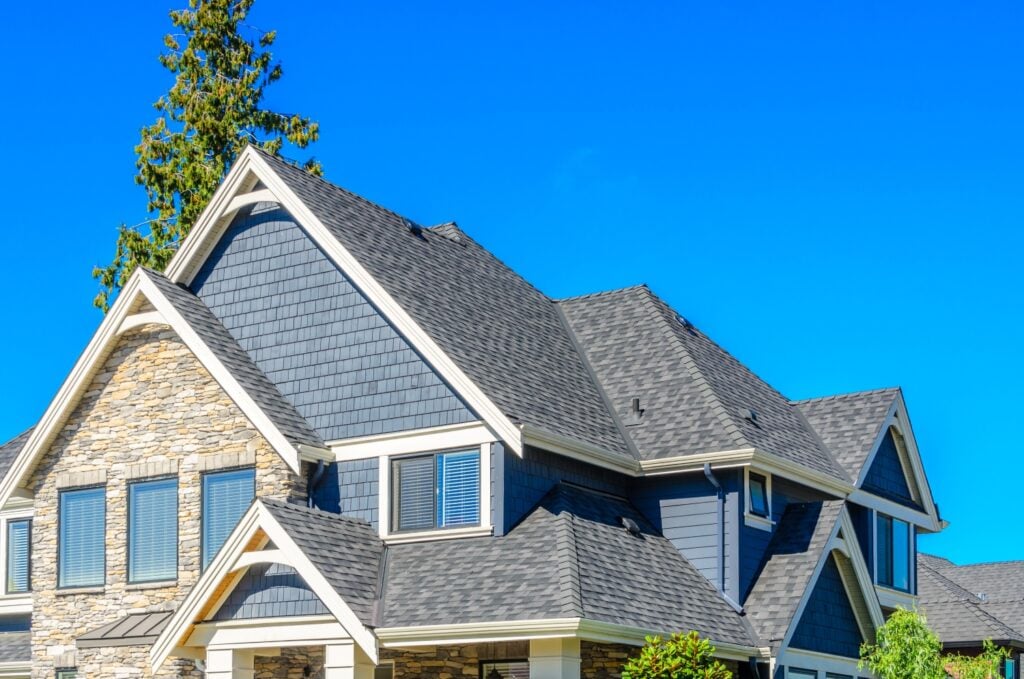
One of the standout features of composite roof shingles is their aesthetic versatility. These shingles can be designed to replicate the appearance of various traditional roofing materials, such as wood shakes, slate, and clay tiles. This allows homeowners to achieve the desired look for their home without the associated costs and maintenance requirements of natural materials.
Composite shingles come in a wide range of colors, textures, and styles, making it easy to find the perfect match for your home’s architectural design and personal preferences. Whether you’re looking for a classic, rustic appearance or a sleek, modern look, composite shingles offer endless possibilities.
In addition to their visual appeal, composite shingles are designed to retain their color and appearance over time. Unlike natural materials that may fade or weather, composite shingles are engineered to resist UV rays and maintain their vibrant hues, ensuring your home looks stunning for years to come.
Choose Composite Shingles for Your Home
Composite roof shingles offer a compelling combination of durability, cost-effectiveness, and aesthetic appeal, making them an excellent choice for homeowners. Their impressive lifespan, low maintenance requirements, and resistance to weather-related damage provide long-term value and peace of mind.
If you’re considering a roofing project and want to learn more about the benefits of composite roof shingles, schedule an appointment with Kenneth Daniel Roofing today. Our team of experts is ready to help you choose the perfect roofing solution for your home and ensure a seamless installation process. Don’t wait—elevate your home’s style and protection with composite shingles!
8 Step Roof Maintenance Guide for Homeowners
6.30.24
5 minutes read
Your home is one of the largest (if not the largest) investments you own. Your roof plays a huge part in protecting that investment by:
- Shielding your home from the elements
- Preventing water damage
- Enhancing energy efficiency
- Adding curb appeal and property value
But your roof can only do that if you keep it properly maintained. Here are eight roof maintenance steps that every homeowner should follow to extend the lifespan of their roof and preserve the integrity of their home.
1. Inspect Your Roof Regularly
Regular inspections are crucial for spotting early signs of damage before they become major issues. Aim to inspect your roof at least twice a year, preferably in the spring and fall. For this step, you’ll need:
- A sturdy ladder
- Binoculars
- A notebook and pen
Start by examining the roof from the ground using binoculars. Look for missing or damaged shingles, rust spots on flashing, and moss or algae growth. If it’s safe to do so, climb up the ladder for a closer look.
Note any areas that need attention. Document any signs of damage by taking photos and writing down a description. This will be helpful for reference during the repair process.
If you’re uncomfortable performing this inspection yourself, this might be a good time to call a roofing contractor for a professional assessment.
2. Clean Your Gutters
Clogged gutters can lead to water damage along your roofline and foundation. Cleaning your gutters helps ensure proper water drainage. Tools you’ll need include:
- A sturdy ladder
- Gloves
- A garden trowel
- A hose
Carefully remove debris from the gutters using a trowel and your hands. If you have gutter guards, remove and clean them as well. Once the debris is cleared, use a hose to flush out any remaining dirt and check for proper water flow.
Check for leaks and ensure that water flows freely through the downspouts. Also check the fasteners that hold your gutter to your roof, as they can become loose over time.
This is a vital part of the roof maintenance process because it prevents excessive water damage and potential foundation issues.
3. Trim Overhanging Branches
Overhanging branches can damage your roof by scraping against shingles and dropping leaves that clog gutters. For this task, you’ll need:
- Pruning shears
- A pole saw (for higher branches)
- Protective gloves
Trim back any branches that hang over your roof. Aim to keep them at least 10 feet away to prevent damage from falling limbs during a storm. Mold and algae growth can also occur in areas shaded by overhanging branches, so removing them can help keep your roof clean.
As a bonus, regularly trimming trees around your home not only protects your roof but also improves the health of your trees!

4. Remove Moss and Algae
Moss and algae can cause shingles to deteriorate over time. To clean your roof, you’ll need:
- A soft-bristle brush
- Moss and algae remover (available at hardware stores)
- A garden hose
Apply the moss and algae remover according to the manufacturer’s instructions. Use a soft-bristle brush to gently scrub away the growth. Rinse the roof with a hose, avoiding high-pressure settings that can damage shingles.
If you find that you have any stubborn spots that just won’t go away, consider hiring a professional roof cleaning service. Also, if you notice the plant growth has gotten below the top layer of roofing material, call a professional roofer, since replacing the shingles may be necessary.

5. Check and Repair Flashing
Flashing is essential for preventing water from seeping into your home where the roof meets walls, chimneys, and other structures. You’ll need:
- A ladder
- Roofing cement or caulk
- A caulking gun
- Replacement flashing (if necessary)
Inspect the flashing for cracks, rust, or other damage. Use roofing cement or caulk to seal any gaps or cracks. If the flashing is severely damaged, replace it entirely.
Properly maintained flashing is crucial for preventing leaks and water damage. Without it, your roof is susceptible to mold, rot, and other issues.
6. Inspect and Seal Skylights
Skylights can be a beautiful addition to your home, but they also require regular maintenance to prevent leaks. For this step, gather:
- A ladder
- Silicone caulk
- A caulking gun
- Glass cleaner and a soft cloth
Check the seals around your skylights for cracks or gaps. Clean the glass thoroughly to remove dirt and debris. Apply silicone caulk to seal any gaps and ensure a watertight seal.
If you leave the caulk around your skylights to crumble, you risk water damage and decreased energy efficiency due to drafts.
7. Replace Damaged Shingles
Damaged shingles can lead to leaks and other problems if not addressed promptly. To replace shingles, you’ll need:
- A flat pry bar
- Roofing nails
- Replacement shingles
- A hammer
Carefully lift the damaged shingle with the pry bar and remove the nails. Slide the new shingle into place and secure it with roofing nails. Ensure that the new shingle lies flat and is properly aligned with the surrounding shingles.
Before doing this, double check with your roofing manufacturer or a professional roofer to make sure the replacement shingles match in color and style. Also ensure that you won’t be voiding any warranties by performing the replacement yourself.
8. Schedule Professional Roof Inspections
While regular self-inspections are important, having a professional roofing contractor inspect your roof annually is a wise investment. They have the expertise to identify issues that might be missed during a DIY inspection. They can also provide recommendations for maintenance and repairs to keep your roof in top condition.
Schedule an inspection with a reputable contractor at least annually to ensure your roof remains in optimal condition.
Keep Your Roof in Tip-Top Shape
Proper roof maintenance is essential for protecting your home and extending the lifespan of your roof. By following these eight steps, you can prevent costly repairs and keep your roof in excellent condition.
If you’re looking for support with your regular roof maintenance, reach out to Kenneth Daniel for expert assistance. Happy maintaining!
How to Get Insurance to Pay for Roof Replacement (In 2024)
6.26.24
5 minutes read
When the winds blow and storms rage, there are many kinds of damage that can happen to your property:
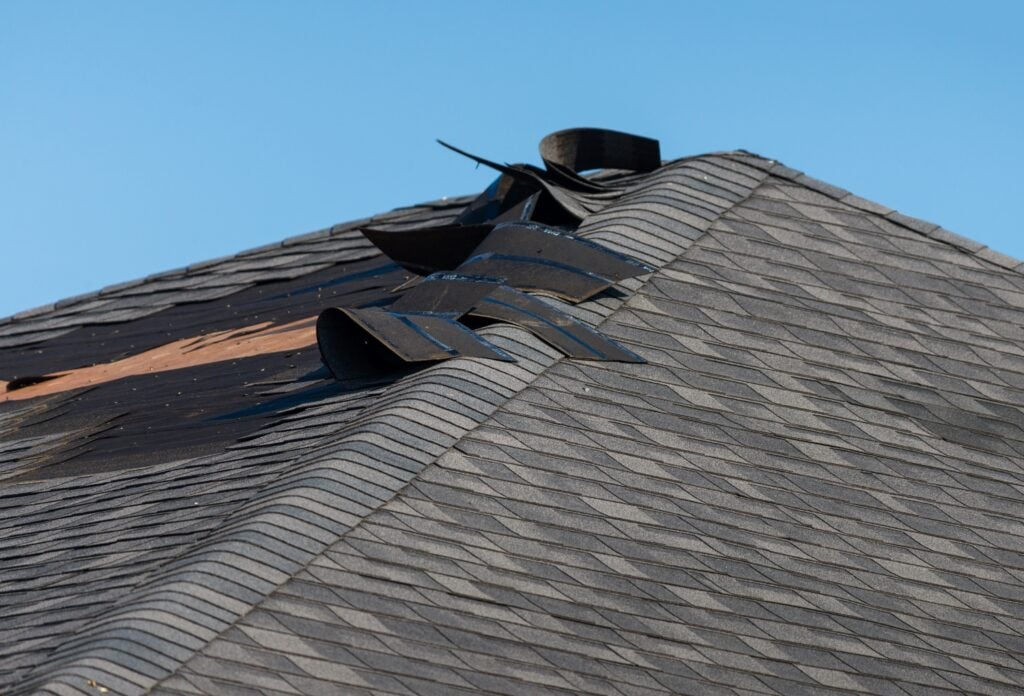
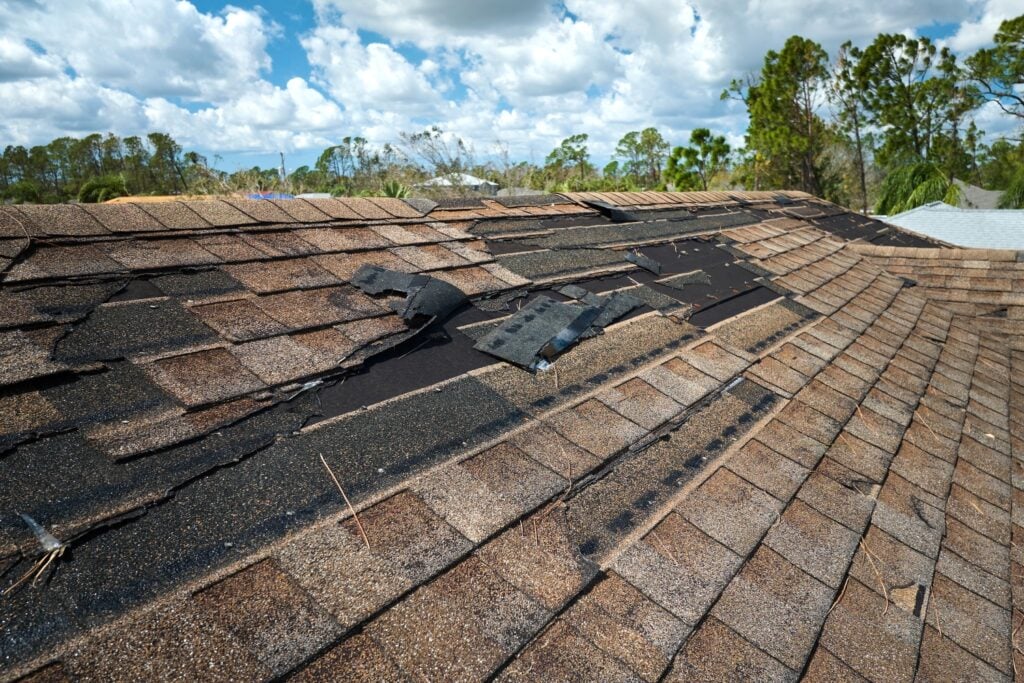
- Wind Damage: High winds can rip shingles right off your roof.
- Hail Damage: Hailstones can crack or puncture your roofing material.
- Water Damage: Heavy rains can lead to leaks and water intrusion.
- Falling Debris: Tree limbs or other debris can fall and damage your roof.
One of the worst things, though, is storm damage to your roof. Once you’ve completed your emergency repairs, you have to figure out when you’ll get the damage repaired and how you’ll pay for it. If you’re hoping to get your insurance company to pay for part (or all) of the repairs, make sure you follow these steps.
Collect Documentation
The first and most crucial step in getting your homeowners insurance to pay for a roof replacement is to collect thorough documentation of the roof damage. This evidence will support your claim and prove the extent of the damage to the insurance company.
As soon as it is safe to do so, inspect your property. Note the date and time of the storm and any immediate visible damage.
Capture clear images and video footage of the damaged areas. Include wide shots to show the overall impact and close-ups to highlight specific damage.
Write down observations about the damage, including the nature and extent. Jot down descriptions of missing shingles, dents, cracks, and leaks.
Documentation serves as tangible proof of the damage, which is essential when filing a claim. Without proper evidence, there is a risk of your claim being denied or undervalued. Insurance companies need concrete data to assess the damage accurately.
Key Tips for Effective Documentation
- Use Timestamped Photos: Ensure that your camera or smartphone shows the date and time on the images.
- Include Multiple Angles: Take photos from various angles to get a comprehensive view of the damage.
- Keep All Receipts: If you make any emergency repairs, keep receipts and document the costs.
Contact Your Insurance Company
Once you have gathered all necessary documentation, the next step is to contact your insurance company to report the damage.
Use the contact information on your policy documents. Explain the situation briefly and inform them of the storm damage. Follow their instructions for submitting photos, videos, and notes. This can often be done through an online portal or email. Make sure to get a claim number for future reference and to track your claim’s progress.
Promptly reporting the damage ensures that your claim is processed in a timely manner. Delaying this step can result in longer wait times and potential complications in the claims process.
Schedule an Inspection with an Insurance Adjuster
After reporting the damage, your insurance company will likely send an insurance adjuster to inspect your property and assess the damage.
It’s important to be there to answer any questions and provide additional information. Show the adjuster your photos, videos, and notes. Ensure that the adjuster sees every damaged area you’ve documented.
The adjuster’s assessment will play a significant role in determining the amount of compensation you receive. A thorough inspection ensures nothing is overlooked.
Get Repair Estimates from Roofing Companies
To ensure you get a fair settlement, it’s wise to obtain repair estimates from reputable roofing companies. Be sure to:
- Contact Multiple Companies: Reach out to at least three roofing companies for quotes.
- Provide Detailed Damage Information: Share your documentation and allow the contractors to inspect the damage.
- Request Written Estimates: Ensure that each estimate is detailed and provided in writing.
Having multiple estimates gives you a benchmark for the cost of repairs. This information can be used to negotiate with your insurance company if their offer falls short of covering the repair costs.
Submit the Claim
With all your documentation and estimates in hand, submit your official claim to the insurance company.
Steps to Submit
- Complete Claim Forms: Fill out any forms required by your insurance company.
- Attach Documentation and Estimates: Include all photos, videos, notes, and repair estimates.
- Follow Up: Keep track of your submission and follow up regularly to check the status of your insurance claim.
Submitting a complete and well-documented claim increases the likelihood of it being processed quickly and fairly. It demonstrates your diligence and thoroughness, which can work in your favor. Be aware of any deadlines for submitting claims, and maintain copies of all submitted documents for your records.
Review the Settlement Offer
Once your insurance company processes your claim, they will provide a settlement offer based on the adjuster’s report and your submitted documentation.
Check if the offer aligns with the repair costs provided by the roofing companies. Ensure that it covers all aspects of the damage and necessary repairs. If the offer is lower than expected, don’t hesitate to negotiate with your insurance company.
Accepting a low offer can leave you covering a significant portion of the repair costs out of pocket. Reviewing and negotiating ensures you receive a fair settlement.
Hire a Roofing Company
Once you’ve reviewed and accepted the settlement offer, hire a roofing company to begin repairs.
Choose one of the companies that provided an estimate. Ensure the contract details all work to be done, materials to be used, and the cost. Finally, coordinate a timeline that works for both you and the contractor.
Professional repairs ensure the job is done correctly and safely, protecting your home from future issues. A reputable contractor will also provide warranties on their work.
Get the Support You Deserve
Navigating the process to get your insurance to pay for a roof replacement can be daunting, but taking each step carefully ensures you’re well-prepared and positioned for success. From documenting damage to negotiating settlement offers, each phase is crucial in securing the coverage you deserve.
For storm damage repair, book an appointment with Kenneth Daniel Roofing today. Our experts are here to assist you every step of the way, ensuring your roof is restored to its best condition.